

Military history of Australia during World War I
Encyclopedia
Australia
Australia , officially the Commonwealth of Australia, is a country in the Southern Hemisphere comprising the mainland of the Australian continent, the island of Tasmania, and numerous smaller islands in the Indian and Pacific Oceans. It is the world's sixth-largest country by total area...
, the outbreak of World War I
World War I
World War I , which was predominantly called the World War or the Great War from its occurrence until 1939, and the First World War or World War I thereafter, was a major war centred in Europe that began on 28 July 1914 and lasted until 11 November 1918...
was greeted with considerable enthusiasm. Even before Britain
United Kingdom
The United Kingdom of Great Britain and Northern IrelandIn the United Kingdom and Dependencies, other languages have been officially recognised as legitimate autochthonous languages under the European Charter for Regional or Minority Languages...
declared war on Germany
Germany
Germany , officially the Federal Republic of Germany , is a federal parliamentary republic in Europe. The country consists of 16 states while the capital and largest city is Berlin. Germany covers an area of 357,021 km2 and has a largely temperate seasonal climate...
on 4 August 1914, the nation pledged its support for the Empire alongside other Commonwealth nations and almost immediately began preparations to send forces overseas to participate in the conflict. The first campaign that Australians were involved in was in German New Guinea
German New Guinea
German New Guinea was the first part of the German colonial empire. It was a protectorate from 1884 until 1914 when it fell to Australia following the outbreak of the First World War. It consisted of the northeastern part of New Guinea and several nearby island groups...
after a hastily raised force known as the Australian Naval and Military Expeditionary Force
Australian Naval and Military Expeditionary Force
The Australian Naval and Military Expeditionary Force was a small volunteer force of approximately 2,000 men, raised in Australia shortly after the outbreak of the First World War to seize and destroy German wireless stations in German New Guinea in the south-west Pacific...
was dispatched from Australia to seize German possessions in the Pacific in September 1914. At the same time another expeditionary force, initially consisting of 20,000 men and known as the First Australian Imperial Force
First Australian Imperial Force
The First Australian Imperial Force was the main expeditionary force of the Australian Army during World War I. It was formed from 15 August 1914, following Britain's declaration of war on Germany. Generally known at the time as the AIF, it is today referred to as the 1st AIF to distinguish from...
(AIF), was raised for service overseas.
The AIF departed Australia in November 1914 and, after several delays due to the presence of German naval vessels in the Indian Ocean, arrived in Egypt, where they were initially used to defend the Suez Canal
Suez Canal
The Suez Canal , also known by the nickname "The Highway to India", is an artificial sea-level waterway in Egypt, connecting the Mediterranean Sea and the Red Sea. Opened in November 1869 after 10 years of construction work, it allows water transportation between Europe and Asia without navigation...
. In early 1915, however, it was decided to carry out an amphibious landing on the Gallipoli peninsula with the goal of opening up a second front and securing the passage of the Dardanelles
Dardanelles
The Dardanelles , formerly known as the Hellespont, is a narrow strait in northwestern Turkey connecting the Aegean Sea to the Sea of Marmara. It is one of the Turkish Straits, along with its counterpart the Bosphorus. It is located at approximately...
. The Australians and New Zealanders, grouped together as the Australian and New Zealand Army Corps
Australian and New Zealand Army Corps
The Australian and New Zealand Army Corps was a First World War army corps of the Mediterranean Expeditionary Force that was formed in Egypt in 1915 and operated during the Battle of Gallipoli. General William Birdwood commanded the corps, which comprised troops from the First Australian Imperial...
(ANZAC), went ashore on 25 April 1915 and for the next eight months the Anzacs, alongside their British, French and other allies, fought a costly and ultimately unsuccessful campaign against the Turks.
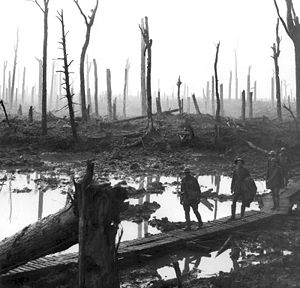
The force was evacuated from the peninsula in December 1915 and returned to Egypt, where the AIF was expanded. In early 1916 it was decided that the infantry divisions would be sent to France, where they took part in many of the major battles fought on the Western Front
Western Front (World War I)
Following the outbreak of World War I in 1914, the German Army opened the Western Front by first invading Luxembourg and Belgium, then gaining military control of important industrial regions in France. The tide of the advance was dramatically turned with the Battle of the Marne...
. Most of the light horse units remained in the Middle East until the end of the war, carrying out further operations against the Turks in Egypt and Palestine
Sinai and Palestine Campaign
The Sinai and Palestine Campaigns took place in the Middle Eastern Theatre of World War I. A series of battles were fought between British Empire, German Empire and Ottoman Empire forces from 26 January 1915 to 31 October 1918, when the Armistice of Mudros was signed between the Ottoman Empire and...
. Small numbers of Australians served in other theatres of war. While the main focus of the Australian military's effort was the ground war, air and naval forces were also committed. Squadrons of the Australian Flying Corps served in the Middle East and on the Western Front, while elements of the Royal Australian Navy
Royal Australian Navy
The Royal Australian Navy is the naval branch of the Australian Defence Force. Following the Federation of Australia in 1901, the ships and resources of the separate colonial navies were integrated into a national force: the Commonwealth Naval Forces...
carried out operations in the Atlantic, North Sea
North Sea
In the southwest, beyond the Straits of Dover, the North Sea becomes the English Channel connecting to the Atlantic Ocean. In the east, it connects to the Baltic Sea via the Skagerrak and Kattegat, narrow straits that separate Denmark from Norway and Sweden respectively...
, Adriatic and Black Sea
Black Sea
The Black Sea is bounded by Europe, Anatolia and the Caucasus and is ultimately connected to the Atlantic Ocean via the Mediterranean and the Aegean seas and various straits. The Bosphorus strait connects it to the Sea of Marmara, and the strait of the Dardanelles connects that sea to the Aegean...
, as well as the Pacific and Indian Ocean
Indian Ocean
The Indian Ocean is the third largest of the world's oceanic divisions, covering approximately 20% of the water on the Earth's surface. It is bounded on the north by the Indian Subcontinent and Arabian Peninsula ; on the west by eastern Africa; on the east by Indochina, the Sunda Islands, and...
s.
By the end of the war, Australians were far more circumspect. The nation's involvement cost over 60,000 Australians their lives and many more were left unable to work as a result of their injuries. The impact of the war was felt in many other areas also. Financially it was very costly, while the effect on the social and political landscape was considerable and threatened to cause serious divides in the nation's social fabric. Conscription
Conscription in Australia
Conscription in Australia, or mandatory military service also known as National Service, has a controversial history dating back to the first years of nationhood...
was possibly the most contentious issue and ultimately, despite having conscription for home service, Australia was one of only two combatants not to use conscripts in the fighting. Nevertheless, for many Australians the nation's involvement in World War I and the Gallipoli campaign was seen as a symbol of its emergence as an international actor, while many of the notions of the Australian character and nationhood that exist today have their origins in the war and Anzac Day
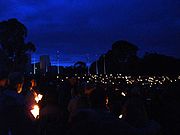
ANZAC Day
Anzac Day is a national day of remembrance in Australia and New Zealand, commemorated by both countries on 25 April every year to honour the members of the Australian and New Zealand Army Corps who fought at Gallipoli in the Ottoman Empire during World War I. It now more broadly commemorates all...
is celebrated as a national holiday.
Outbreak of the war
British Empire
The British Empire comprised the dominions, colonies, protectorates, mandates and other territories ruled or administered by the United Kingdom. It originated with the overseas colonies and trading posts established by England in the late 16th and early 17th centuries. At its height, it was the...
became automatically involved, with Prime Minister
Prime Minister of Australia
The Prime Minister of the Commonwealth of Australia is the highest minister of the Crown, leader of the Cabinet and Head of Her Majesty's Australian Government, holding office on commission from the Governor-General of Australia. The office of Prime Minister is, in practice, the most powerful...
Joseph Cook
Joseph Cook
Sir Joseph Cook, GCMG was an Australian politician and the sixth Prime Minister of Australia. Born as Joseph Cooke and working in the coal mines of Silverdale, Staffordshire during his early life, he emigrated to Lithgow, New South Wales during the late 1880s, and became General-Secretary of the...
stating on 5 August 1914 that "...when the Empire is at war, so also is Australia." Given the predominantly British heritage of most Australians at the time, there was considerable support from all corners of the country and large numbers of young Australian men reported to recruiting centres around the country to enlist in the following months. When Prime Minister Andrew Fisher
Andrew Fisher
Andrew Fisher was an Australian politician who served as the fifth Prime Minister on three separate occasions. Fisher's 1910-13 Labor ministry completed a vast legislative programme which made him, along with Protectionist Alfred Deakin, the founder of the statutory structure of the new nation...
's Labor Party
Australian Labor Party
The Australian Labor Party is an Australian political party. It has been the governing party of the Commonwealth of Australia since the 2007 federal election. Julia Gillard is the party's federal parliamentary leader and Prime Minister of Australia...
came to power in September 1914, he reiterated Cook's statement saying, "Should the worst happen ...", Australia would "...rally to the Mother Country ... to help and defend her to our last man and our last shilling."
Within days, plans for an Australian expeditionary force were completed by Brigadier General
Brigadier General
Brigadier general is a senior rank in the armed forces. It is the lowest ranking general officer in some countries, usually sitting between the ranks of colonel and major general. When appointed to a field command, a brigadier general is typically in command of a brigade consisting of around 4,000...
William Throsby Bridges
William Throsby Bridges
Major General Sir William Throsby Bridges KCB, CMG served with Australian forces during World War I, and was the first Australian to reach general officer rank...
and his staff officer, Major Cyril Brudenell Bingham White
Brudenell White
General Sir Cyril Brudenell Bingham White KCB, KCMG, KCVO, DSO was a senior officer in the Australian Army, who served as Chief of the General Staff from 1920 to 1923 and again from March to August 1940, when he was killed in the Canberra air disaster.-Early Life and career:White was born in St...
. White proposed a force of 18,000 men (12,000 Australians and 6,000 New Zealand
New Zealand
New Zealand is an island country in the south-western Pacific Ocean comprising two main landmasses and numerous smaller islands. The country is situated some east of Australia across the Tasman Sea, and roughly south of the Pacific island nations of New Caledonia, Fiji, and Tonga...
ers). This proposal was approved by Prime Minister Cook but he increased the offer to the British to 20,000 men to serve in any destination desired by the Home Government. On 6 August 1914, London cabled its acceptance of the force and asked that it be sent as soon as possible. Recruiting offices opened on 10 August 1914 and by the end of 1914, 52,561 volunteers had been accepted, although strict physical fitness guidelines were put in place.
German New Guinea
In 1884, Germany had colonised the north eastern part of New Guinea
New Guinea
New Guinea is the world's second largest island, after Greenland, covering a land area of 786,000 km2. Located in the southwest Pacific Ocean, it lies geographically to the east of the Malay Archipelago, with which it is sometimes included as part of a greater Indo-Australian Archipelago...
and several nearby island groups. By the outbreak of the war, the Germans had been using the colony as a wireless radio base, and supporting the German East Asia Squadron
German East Asia Squadron
The German East Asia Squadron was a German Navy cruiser squadron which operated mainly in the Pacific Ocean between the 1870s and 1914...
which threatened merchant shipping in the region. As a consequence, Britain required the wireless installations to be destroyed. Shortly after the outbreak of war—following a request by the British government on 6 August 1914—the Australian Naval and Military Expeditionary Force (AN&MEF) began forming. The objectives of the force were the German stations at Yap
Yap
Yap, also known as Wa'ab by locals, is an island in the Caroline Islands of the western Pacific Ocean. It is a state of the Federated States of Micronesia. Yap's indigenous cultures and traditions are still strong compared to other neighboring islands. The island of Yap actually consists of four...
in the Caroline Islands
Caroline Islands
The Caroline Islands are a widely scattered archipelago of tiny islands in the western Pacific Ocean, to the north of New Guinea. Politically they are divided between the Federated States of Micronesia in the eastern part of the group, and Palau at the extreme western end...
, Nauru
Nauru
Nauru , officially the Republic of Nauru and formerly known as Pleasant Island, is an island country in Micronesia in the South Pacific. Its nearest neighbour is Banaba Island in Kiribati, to the east. Nauru is the world's smallest republic, covering just...
and at Rabaul
Rabaul
Rabaul is a township in East New Britain province, Papua New Guinea. The town was the provincial capital and most important settlement in the province until it was destroyed in 1994 by falling ash of a volcanic eruption. During the eruption, ash was sent thousands of metres into the air and the...
, New Britain
New Britain
New Britain, or Niu Briten, is the largest island in the Bismarck Archipelago of Papua New Guinea. It is separated from the island of New Guinea by the Dampier and Vitiaz Straits and from New Ireland by St. George's Channel...
. The AN&MEF comprised one battalion of infantry (1,023 men) enlisted in Sydney, 500 naval reservists and ex-sailors organised into six companies who would serve as infantry and a further 500 men from the Kennedy Regiment, a Queensland militia battalion that had volunteered for overseas service and had been sent to garrison Thursday Island. Together, these forces were placed under the command of Colonel William Holmes, an officer in the militia who was at the time commander of the 6th Brigade
6th Brigade (Australia)
The 6th Brigade is an Australian Army brigade. First formed during the First World War as an infantry unit of the Australian Imperial Force, the brigade served at Gallipoli and in France and Belgium on the Western Front...
and secretary of the Sydney Water and Sewerage Board
Sydney Water
Sydney Water is a New South Wales government owned corporation that provides drinking water, wastewater and some stormwater services to Sydney, Illawarra and the Blue Mountains, in Australia...
.
The task force sailed from Sydney on 19 August 1914, and hove to off Port Moresby where they waited for their escorts to arrive. While they were at Port Moresby, Holmes decided to disembark the Queensland militia soldiers due to concerns about their preparedness for action. Escorted by the cruisers Sydney and Australia, the task force reached Rabaul
Rabaul
Rabaul is a township in East New Britain province, Papua New Guinea. The town was the provincial capital and most important settlement in the province until it was destroyed in 1994 by falling ash of a volcanic eruption. During the eruption, ash was sent thousands of metres into the air and the...
on 11 September 1914 and found that the port was free of German forces. Sydney and the destroyer landed small parties of naval reservists at the settlements of Kabakaul and the German gubernatorial capital Herbertshöhe on Neu-Pommern, south-east of Rabaul. These parties were reinforced first by sailors from and and later by infantry from the transport .
Battle of Bita Paka
The Battle of Bita Paka was fought south of Kabakaul, on the island of New Britain, and was a part of the invasion and subsequent occupation of German New Guinea by the Australian Naval and Military Expeditionary Force shortly after the outbreak of the First World War...
six Australians were killed and five wounded, while the defenders lost one German non-commissioned officer
Non-commissioned officer
A non-commissioned officer , called a sub-officer in some countries, is a military officer who has not been given a commission...
(NCO) and about 30 Melanesians killed, and one German and ten Melanesians wounded. Later it was alleged that the heavy losses among the Melanesian troops was the result of the Australians bayoneting all those they had captured during the fighting. As a result of this engagement, Able Seaman
Able Seaman (rank)
In the British Royal Navy in the middle of the 18th century, the term able seaman referred to a seaman with at least two years' experience at sea...
W.G.V. Williams became the first Australian fatality of the war. The first Army fatality was a medical officer, Captain B. C. A. Pockley, who died the same day.
At nightfall on 12 September, the Berrima landed the AN&MEF infantry battalion at Rabaul. The following afternoon, although the governor had not yet surrendered the territory, a ceremony was carried out to signal the British occupation of New Britain. The German administration had withdrawn inland to Toma and at dawn on 14 September, and subsequently bombarded a ridge near the town, while half a battalion advanced towards the town supported by a field gun
Field gun
A field gun is an artillery piece. Originally the term referred to smaller guns that could accompany a field army on the march and when in combat could be moved about the battlefield in response to changing circumstances, as to opposed guns installed in a fort, or to siege cannon or mortars which...
. The show of fire power was sufficient to start negotiations, ending the Siege of Toma
Siege of Toma
The Siege of Toma was a bloodless action during the First World War on the island of New Britain between 14–17 September 1914 as part of the occupation of German New Guinea by the Australian Naval and Military Expeditionary Force...
following the surrender of the remaining garrison of 40 Germans and 110 native police. The German territory surrendered on 17 September 1914.
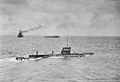
Although successful the operation was arguably not well managed, and the Australians had been effectively delayed by a half-trained native force. Regardless the Australians had prevailed not least of all because of their unexpected ability to fight in close terrain, while the outflanking of the German positions had unnerved their opponents. The losses of the AN&MEF were light in the context of later operations but were sufficiently heavy given the relatively modest gain. These losses were further compounded by the unexplained disappearance of the Australian submarine during a patrol off Rabaul on 14 September, with 35 men aboard.
Following the capture of German possessions in the region, the AN&MEF provided occupation forces for the duration of the war. On 9 January 1915, Holmes handed over command of the AN&MEF to Brigadier General Sir Samuel Pethebridge, the former Secretary of the Department of Defence
Department of Defence (Australia)
The Australian Department of Defence is a Federal Government Department. It forms part of the Australian Defence Organisation along with the Australian Defence Force . The Defence mission is to defend Australia and its national interests...
. Holmes returned to Australia and re-enlisted in the AIF, as did most of his men. They were replaced by the 3rd Battalion, known as the "Tropical Force" because it had been specially enlisted for service in the tropics. Pethebridge established the administrative structures that remain through the period of military occupation. Although required by International law
International law
Public international law concerns the structure and conduct of sovereign states; analogous entities, such as the Holy See; and intergovernmental organizations. To a lesser degree, international law also may affect multinational corporations and individuals, an impact increasingly evolving beyond...
to follow the German forms of government, the territory gradually acquired the appearance of a British colony.
First Australian Imperial Force
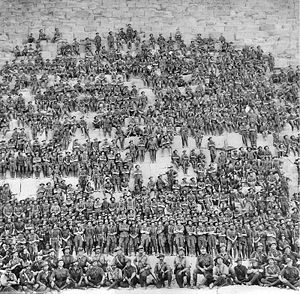
At the start of the war, Australia's military forces were focused upon the militia and what Regular forces existed were mostly serving in the artillery or engineers and were assigned in most part to the task of coastal defence. Due to the provisions of the Defence Act 1903, which precluded sending conscripts overseas, upon the outbreak of war it was realised that a totally separate, all volunteer force would need to be raised. This force was known as the Australian Imperial Force (AIF).The AIF raised for World War I service has subsequently been called the First AIF in order to distinguish it from the Second AIF which was raised during World War II.
The AIF began forming shortly after the outbreak of war and was the brain child of William Throsby Bridges
William Throsby Bridges
Major General Sir William Throsby Bridges KCB, CMG served with Australian forces during World War I, and was the first Australian to reach general officer rank...
and Cyril Brudenell Bingham White
Brudenell White
General Sir Cyril Brudenell Bingham White KCB, KCMG, KCVO, DSO was a senior officer in the Australian Army, who served as Chief of the General Staff from 1920 to 1923 and again from March to August 1940, when he was killed in the Canberra air disaster.-Early Life and career:White was born in St...
. Upon formation, the AIF consisted of only one infantry division, the 1st Australian Division, and the 1st Light Horse Brigade
1st Light Horse Brigade
The 1st Light Horse Brigade was a mounted infantry brigade of the First Australian Imperial Force which served in the Middle Eastern theatre of World War I. The brigade first saw action during the Dardanelles Campaign in the Battle of Gallipoli. After being withdrawn to Egypt in February 1916 they...
. The 1st Division was made up of the 1st Infantry Brigade
Australian 1st Brigade
1st Brigade is a formation of the Australian Army intended as its primary mechanised formation. Raised for service initially in 1914 for service during World War I, the brigade fought at Gallipoli and on the Western Front before being disbanded in mid-1919. In 1921, the 1st Brigade was re-raised as...
under Colonel Henry MacLaurin; the 2nd
2nd Brigade (Australia)
The 2nd Brigade was a brigade-sized infantry unit of the Australian Army.Formed in 1903 as militia formation based in Victoria, the brigade later served during the First World War as part of the Australian Imperial Force, allocated to the 1st Division...
, under Colonel James Whiteside McCay
James Whiteside McCay
Lieutenant General Sir James Whiteside McCay KCMG, KBE, CB, VD was an Australian general and politician. A graduate of the University of Melbourne, where he earned Master of Arts and Master of Laws degrees, he established a successful legal practice, McCay & Thwaites...
, an Australian politician and former Minister for Defence
Minister for Defence (Australia)
The Minister for Defence of Australia administers his portfolio through the Australian Defence Organisation, which comprises the Department of Defence and the Australian Defence Force. Stephen Smith is the current Minister.-Ministers for Defence:...
; and the 3rd
Australian 3rd Brigade
The 3rd Brigade is a combined arms brigade of the Australian Army, based around the 1st, 2nd and 3rd Battalions of the Royal Australian Regiment . It was originally formed in 1914 for service during World War I, taking part in the fighting at Gallipoli and on the Western Front in Europe...
, under Colonel Ewen Sinclair MacLagan, a British regular officer seconded to the Australian Army before the war. The 1st Light Horse Brigade was commanded by Colonel Henry George Chauvel
Henry George Chauvel
General Sir Harry Chauvel GCMG, KCB was a senior officer of the Australian Imperial Force who fought at Gallipoli and in the Middle Eastern theatre during the First World War. He was the first Australian to attain the rank of lieutenant general and later general, and the first to lead a corps...
, an Australian regular, while the divisional artillery was commanded by Colonel Talbot Hobbs
Talbot Hobbs
Lieutenant General Sir Joseph John Talbot Hobbs KCB, KCMG, VD was an Australian architect and First World War general.-Early life:...
.
In the early stages of mobilisation the men of the AIF were selected under some of the toughest criterion of any army in World War I and it is believed that roughly 30% of men that applied were rejected on medical grounds. In order to enlist, men had to be aged between 18 and 35 years of age (although it is believed that men as old as 70 and as young as 14 managed to enlist), and they had to be at least five foot six inches tall (168 centimetres), with a chest measurement of at least 34 inches (86 centimetres). Many of these strict requirements were lifted later in the war, however, as the need for replacements grew. Indeed, casualties among the initial volunteers were so high, that of the 32,000 original soldiers of the AIF only 7,000 would survive to the end of the war.
The initial response was so good that in September 1914 the decision was made to raise the 4th Infantry Brigade and 2nd and 3rd Light Horse Brigades. The 4th Infantry Brigade was commanded by Colonel John Monash
John Monash
General Sir John Monash GCMG, KCB, VD was a civil engineer who became the Australian military commander in the First World War. He commanded the 13th Infantry Brigade before the War and then became commander of the 4th Brigade in Egypt shortly after the outbreak of the War with whom he took part...
, a prominent Melbourne
Melbourne
Melbourne is the capital and most populous city in the state of Victoria, and the second most populous city in Australia. The Melbourne City Centre is the hub of the greater metropolitan area and the Census statistical division—of which "Melbourne" is the common name. As of June 2009, the greater...
civil engineer
Civil engineer
A civil engineer is a person who practices civil engineering; the application of planning, designing, constructing, maintaining, and operating infrastructures while protecting the public and environmental health, as well as improving existing infrastructures that have been neglected.Originally, a...
and businessman. The AIF continued to grow through the war, eventually numbering five infantry division
Division (military)
A division is a large military unit or formation usually consisting of between 10,000 and 20,000 soldiers. In most armies, a division is composed of several regiments or brigades, and in turn several divisions typically make up a corps...
s, two mounted divisions and a mixture of other units. A sixth infantry division, the Australian 6th Division, was partially formed in the United Kingdom February 1917. Casualties from the First Battle of Bullecourt and the Battle of Messines
Battle of Messines
The Battle of Messines was a battle of the Western front of the First World War. It began on 7 June 1917 when the British Second Army under the command of General Herbert Plumer launched an offensive near the village of Mesen in West Flanders, Belgium...
caused the disbandment of the partially formed unit to allow the other five divisions to be brought back up to strength.
Background

Albany, Western Australia
Albany is a port city in the Great Southern region of Western Australia, some 418 km SE of Perth, the state capital. As of 2009, Albany's population was estimated at 33,600, making it the 6th-largest city in the state....
on 1 November 1914 in convoy of 10 transports escorted by several British, Australian and Japanese warships. Initially bound for British-controlled Egypt
Egypt
Egypt , officially the Arab Republic of Egypt, Arabic: , is a country mainly in North Africa, with the Sinai Peninsula forming a land bridge in Southwest Asia. Egypt is thus a transcontinental country, and a major power in Africa, the Mediterranean Basin, the Middle East and the Muslim world...
, with a stopover in Ceylon, the convoy had been delayed several times due to fears of interception by German warships in the area. These fears later proved valid when the German cruiser Emden
Emden
Emden is a city and seaport in the northwest of Germany, on the river Ems. It is the main city of the region of East Frisia; in 2006, the city had a total population of 51,692.-History:...
was sighted off Cocos Island
Cocos Island
Cocos Island is an uninhabited island located off the shore of Costa Rica . It constitutes the 11th district of Puntarenas Canton of the province of Puntarenas. It is one of the National Parks of Costa Rica...
. As the convoy steered to avoid the threat, the Australian cruiser, HMAS Sydney
HMAS Sydney (1912)
HMAS Sydney was a Chatham class light cruiser of the Royal Australian Navy . Laid down in 1911 and launched in 1912, the cruiser was commissioned into the RAN in 1913....
, engaged the Emden with her heavier guns and after an engagement that lasted only twenty-five minutes, the Sydney emerged victorious.
The threat of the German Squadron neutralised, the convoy was able to continue its voyage unmolested. Upon their arrival in Egypt in November, the 1st Division moved to Camp Mena, near Cairo
Cairo
Cairo , is the capital of Egypt and the largest city in the Arab world and Africa, and the 16th largest metropolitan area in the world. Nicknamed "The City of a Thousand Minarets" for its preponderance of Islamic architecture, Cairo has long been a centre of the region's political and cultural life...
, where they were used to defend the Suez Canal
Suez Canal
The Suez Canal , also known by the nickname "The Highway to India", is an artificial sea-level waterway in Egypt, connecting the Mediterranean Sea and the Red Sea. Opened in November 1869 after 10 years of construction work, it allows water transportation between Europe and Asia without navigation...
against Turkey who had declared war on 29 October. During this time, the Australians commenced a period of training to prepare them for combat on the Western Front
Western Front (World War I)
Following the outbreak of World War I in 1914, the German Army opened the Western Front by first invading Luxembourg and Belgium, then gaining military control of important industrial regions in France. The tide of the advance was dramatically turned with the Battle of the Marne...
as it was still expected that they would be sent to England for deployment in the European theatre. As they waited, however, the Australian and New Zealand forces in Egypt at the time were formed into the Australian and New Zealand Army Corps
Australian and New Zealand Army Corps
The Australian and New Zealand Army Corps was a First World War army corps of the Mediterranean Expeditionary Force that was formed in Egypt in 1915 and operated during the Battle of Gallipoli. General William Birdwood commanded the corps, which comprised troops from the First Australian Imperial...
(ANZAC) under the command of Lieutenant General William Birdwood, and consisting of the Australian 1st Division and the composite New Zealand and Australian Division
New Zealand and Australian Division
The New Zealand and Australian Division was formed at the start of the Battle of Gallipoli as a composite division under the command of New Zealand general Alexander Godley. At the start of World War I New Zealand had mustered insufficient infantry battalions to form their own division while...
(NZ&A).
Overcrowding and shortages of equipment in England meant that it was decided to keep the Anzacs in Egypt during the European winter, during which time they would undertake further training in order to prepare them for their eventual use in the trenches in France. Despite this, however, the training that the Australians and New Zealanders received in this time could only be considered very rudimentary in nature, and despite popular opinion at the time, it did little to prepare them for what was to come.
In the background, though, moves were being made to commit the Australians and New Zealanders elsewhere. Later in November, Winston Churchill
Winston Churchill
Sir Winston Leonard Spencer-Churchill, was a predominantly Conservative British politician and statesman known for his leadership of the United Kingdom during the Second World War. He is widely regarded as one of the greatest wartime leaders of the century and served as Prime Minister twice...
, in his capacity as First Lord of the Admiralty, put forward his first plans for a naval attack on the Dardanelles
Dardanelles
The Dardanelles , formerly known as the Hellespont, is a narrow strait in northwestern Turkey connecting the Aegean Sea to the Sea of Marmara. It is one of the Turkish Straits, along with its counterpart the Bosphorus. It is located at approximately...
. A plan for an attack and invasion of the Gallipoli
Gallipoli
The Gallipoli peninsula is located in Turkish Thrace , the European part of Turkey, with the Aegean Sea to the west and the Dardanelles straits to the east. Gallipoli derives its name from the Greek "Καλλίπολις" , meaning "Beautiful City"...
peninsula was eventually approved by the British cabinet in January 1915. It was decided that the Australian and New Zealand troops would take part in the operation, although they were outnumbered by the British, Indian and French contingents, a fact which is often overlooked today by many Australians and New Zealanders. The objective of the invasion was to open up another front against the Central Powers
Central Powers
The Central Powers were one of the two warring factions in World War I , composed of the German Empire, the Austro-Hungarian Empire, the Ottoman Empire, and the Kingdom of Bulgaria...
and to open the Black Sea
Black Sea
The Black Sea is bounded by Europe, Anatolia and the Caucasus and is ultimately connected to the Atlantic Ocean via the Mediterranean and the Aegean seas and various straits. The Bosphorus strait connects it to the Sea of Marmara, and the strait of the Dardanelles connects that sea to the Aegean...
's only entrance to the Mediterranean, via the Dardanelles
Dardanelles
The Dardanelles , formerly known as the Hellespont, is a narrow strait in northwestern Turkey connecting the Aegean Sea to the Sea of Marmara. It is one of the Turkish Straits, along with its counterpart the Bosphorus. It is located at approximately...
and Bosphorus, to allow shipping to Russia all year round.
After the failure of naval attacks, it was decided that ground forces were necessary to eliminate the Turkish mobile artillery and allow minesweepers to clear the waters for larger vessels. The British Secretary of State for War
Secretary of State for War
The position of Secretary of State for War, commonly called War Secretary, was a British cabinet-level position, first held by Henry Dundas . In 1801 the post became that of Secretary of State for War and the Colonies. The position was re-instated in 1854...
, Field Marshal Lord Kitchener, appointed General
General (United Kingdom)
General is currently the highest peace-time rank in the British Army and Royal Marines. It is subordinate to the Army rank of Field Marshal, has a NATO-code of OF-9, and is a four-star rank....
Sir Ian Hamilton to command the Mediterranean Expeditionary Force
Mediterranean Expeditionary Force
The Mediterranean Expeditionary Force was part of the British Army during World War I, that commanded all Allied forces at Gallipoli and Salonika. This included the initial naval operation to force the straits of the Dardanelles. Its headquarters was formed in March 1915...
(MEF) that was to carry out the mission. The MEF consisted of Birdwood's ANZAC, British 29th Division
British 29th Division
The British 29th Division, known as the Incomparable Division, was a First World War regular army infantry division formed in early 1915 by combining various units that had been acting as garrisons about the British Empire. Under the command of Major General Aylmer Hunter-Weston, the division...
, British Royal Naval Division and the French Corps expéditionnaire d'Orient. Some 40,000 Russian troops would participate in the capture or occupation of Constantinople
Istanbul
Istanbul , historically known as Byzantium and Constantinople , is the largest city of Turkey. Istanbul metropolitan province had 13.26 million people living in it as of December, 2010, which is 18% of Turkey's population and the 3rd largest metropolitan area in Europe after London and...
.
Landing at Anzac Cove
The invasion plan was for the 29th DivisionBritish 29th Division
The British 29th Division, known as the Incomparable Division, was a First World War regular army infantry division formed in early 1915 by combining various units that had been acting as garrisons about the British Empire. Under the command of Major General Aylmer Hunter-Weston, the division...
to land at Cape Helles
Cape Helles
Cape Helles is the rocky headland at the south-westernmost tip of the Gallipoli peninsula, Turkey. It was the scene of heavy fighting between Turkish and British troops during the landing at Cape Helles at the beginning of the Gallipoli Campaign in 1915....
on the tip of the peninsula and then advance upon the forts at Kilitbahir. The Anzacs were to land north of Gaba Tepe on the Aegean coast from where they could advance across the peninsula and prevent retreat from or reinforcement of Kilitbahir.
The Anzac assault force, the 3rd Brigade
Australian 3rd Brigade
The 3rd Brigade is a combined arms brigade of the Australian Army, based around the 1st, 2nd and 3rd Battalions of the Royal Australian Regiment . It was originally formed in 1914 for service during World War I, taking part in the fighting at Gallipoli and on the Western Front in Europe...
of the Australian 1st Division, began to go ashore shortly before dawn at 4:30 am on 25 April 1915. The intended landing zone was a broad front centred about a mile north of Gaba Tepe, however, possibly due to navigational error or an unexpected current, the landing went awry and the boats concentrated about a mile and a half further north than intended in a shallow, nameless cove between Ari Burnu to the north and Hell Spit to the south. Since 1985, the cove has been officially known as Anzac Koyu (Anzac Cove)
Anzac Cove
Anzac Cove is a small cove on the Gallipoli peninsula in Turkey. It became famous as the site of World War I landing of the ANZAC on April 25, 1915. The cove is a mere long, bounded by the headlands of Ari Burnu to the north and Little Ari Burnu, known as Hell Spit, to the south...
.
The Anzacs were confronted by a treacherous, confusing tangle of ravines and spurs that descended from the heights of the Sarı Baır range to the sea. The landing was only lightly opposed by scattered Turkish units until Mustafa Kemal
Mustafa Kemal Atatürk
Mustafa Kemal Atatürk was an Ottoman and Turkish army officer, revolutionary statesman, writer, and the first President of Turkey. He is credited with being the founder of the Republic of Turkey....
, commanding the 19th Division and perceiving the threat posed by the landings, rushed reinforcements to the area in what became a race for the high ground. The contest for the heights was decided on the second ridge line where the Anzacs and Turks
Turkey
Turkey , known officially as the Republic of Turkey , is a Eurasian country located in Western Asia and in East Thrace in Southeastern Europe...
fought over a knoll called Baby 700. The position changed hands a number of times on the first day before the Turks, having the advantage of the higher ground on Battleship Hill, took final possession of it. Once the Anzac advance was checked, the Turks counter-attacked, trying to force the invaders back to the shore, but failed to dislodge them from the foothold they had gained. A trench perimeter quickly developed and a bloody stalemate ensued until August.
Krithia
In May 1915, Hamilton decided to concentrate his resources in the Helles sector. Birdwood withdrew Colonel McCay's 2nd Infantry Brigade and the New Zealand Infantry Brigade and they moved by sea to Cape Helles on 6 May. During the subsequent Second Battle of Krithia the two brigades suffered 1,827 casualties, including McCay, in an ill-advised daylight advance over open ground that could have been occupied after dark without loss.During May Turkish snipers were particularly active in Monash Valley. On 15 May, one shot and fatally wounded Major General Bridges. His body was returned to Australia and buried on the hill overlooking Royal Military College, Duntroon
Royal Military College, Duntroon
The Royal Military College, Duntroon is the Australian Army's officer training establishment. It was founded at Duntroon, in the Australian Capital Territory, in 1911 and is situated on picturesque grounds at the foot of Mount Pleasant near Lake Burley Griffin, close to the Department of Defence...
in Canberra
Canberra
Canberra is the capital city of Australia. With a population of over 345,000, it is Australia's largest inland city and the eighth-largest city overall. The city is located at the northern end of the Australian Capital Territory , south-west of Sydney, and north-east of Melbourne...
. The Australian government sent Major General James Gordon Legge
James Gordon Legge
Lieutenant General James Gordon Legge CB, CMG was an Australian Army Lieutenant General who served in World War I. His son Stanley Ferguson Legge reached the rank of Major General.-Early life and career:...
from Australia to replace him.
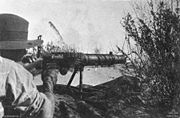
Turkish counter-attack
On 19 May 1915, the Turkish launched an assault against the Anzac perimeter. Forewarned by naval reconnaissance aircraft, the troops were on alert and the position was reinforced by the return of the 2nd and New Zealand Infantry Brigades from Cape Helles and the arrival of the 1st Light Horse Brigade and New Zealand Mounted Rifles Brigade from Egypt. Along most of the line, the attack met with immediate disaster, with the Turkish attackers swept away by the rifle and machine gun fire of the Anzac defenders. At Courtney's Post, one of the most exposed parts of the perimeter, the Turks managed to enter the trenches but there they encountered Lance Corporal Albert JackaAlbert Jacka
Albert Jacka VC, MC & Bar was an Australian recipient of the Victoria Cross, the highest decoration for gallantry "in the face of the enemy" that can be awarded to members of the British and Commonwealth armed forces...
and others, who drove them out again. For his action, Jacka became the first Australian to win the Victoria Cross
Victoria Cross
The Victoria Cross is the highest military decoration awarded for valour "in the face of the enemy" to members of the armed forces of various Commonwealth countries, and previous British Empire territories....
in the war.
August offensive

Suvla
Suvla is a bay on the Aegean coast of the Gallipoli peninsula in European Turkey, south of the Gulf of Saros.On 6 August 1915 it was the site for the Landing at Suvla Bay by the British IX Corps as part of the August Offensive during the Battle of Gallipoli...
, 5 miles (8 km) north of Anzac. Meanwhile at Anzac a strong assault would be made on the Sari Bair range by breaking out through thinly defended sector at the north of the Anzac perimeter. The offensive was preceded on the evening of 6 August by diversionary assaults at Helles and Anzac. At Helles, the diversion at Krithia Vineyard
Battle of Krithia Vineyard
The Battle of Krithia Vineyard was intended as a minor British action at Helles on the Gallipoli peninsula to divert attention from the imminent launch of the August Offensive. Instead, the British commander, Brigadier General H.E...
became another futile battle with no gains and heavy casualties for both sides. At Anzac, an attack on the Turkish trenches at Lone Pine by the infantry brigades of the Australian 1st Division was a rare victory for the ANZACs. At a cost of over 2,000 men, the Australians inflicted 7,000 casualties on the Turks. Because it was an effective attack on a vital position, it was the most effective diversionary attack carried out by the Australians of the war, drawing in the Turkish reserves.
However, the main assault aimed at the peaks of Chunuk Bair and Hill 971 was less successful. The force striking for the nearer peak of Chunuk Bair comprised the New Zealand Infantry Brigade. It came within 500 metres (1,640.4 ft) of the peak by dawn on 7 August but was not able to seize the summit until the following morning. This delay had fatal consequences for another supporting attack on the morning of 7 August, that of the Australian 3rd Light Horse Brigade at the Nek
Battle of the Nek
The Battle of the Nek was a small World War I battle fought as part of the Gallipoli campaign. "The Nek" was a narrow stretch of ridge in the Anzac battlefield on the Gallipoli peninsula. The name derives from the Afrikaans word for a "mountain pass" but the terrain itself was a perfect bottleneck...
which was to coincide with the New Zealanders attacking back down from Chunuk Bair against the rear of the Turkish defences. The New Zealanders held out on Chunuk Bair for two days before relief was provided by two New Army
Kitchener's Army
The New Army, often referred to as Kitchener's Army or, disparagingly, Kitchener's Mob, was an all-volunteer army formed in the United Kingdom following the outbreak of hostilities in the First World War...
battalions from the Wiltshire
Wiltshire Regiment
The Wiltshire Regiment was an infantry regiment of the line in the British Army, formed in 1881 by the amalgamation of the 62nd Regiment of Foot and the 99th Duke of Edinburgh's Regiment of Foot....
and Loyal North Lancashire
Loyal Regiment (North Lancashire)
The Loyal Regiment was an infantry regiment of the line in the British Army from 1881 to 1970...
Regiments. A massive Turkish counter-attack
Counter-Attack
Counter-Attack is a 1945 war film starring Paul Muni and Marguerite Chapman as two Russians trapped in a collapsed building with seven enemy German soldiers during World War II...
, led in person by Mustafa Kemal, swept these two battalions from the heights. Meanwhile, the landing at Suvla Bay
Landing at Suvla Bay
The landing at Suvla Bay was an amphibious landing made at Suvla on the Aegean coast of Gallipoli peninsula in the Ottoman Empire as part of the August Offensive, the final British attempt to break the deadlock of the Battle of Gallipoli...
was only lightly opposed but the British commander, Lieutenant-General Sir Frederick Stopford
Frederick Stopford
Lieutenant General Sir Frederick William Stopford, KCB, KCMG, KCVO was a British Army officer.-Military career:...
, had so diluted his early objectives that little more than the beach was seized. Again the Turks were able to win the race for the high ground of the Anafarta Hills thereby rendering the Suvla front another case of static trench warfare
Trench warfare
Trench warfare is a form of occupied fighting lines, consisting largely of trenches, in which troops are largely immune to the enemy's small arms fire and are substantially sheltered from artillery...
.
The Suvla landing was reinforced by the arrival of the British 53rd and 54th Divisions along with the British 10th Division
British 10th (Irish) Division
The 10th Division, was one of the first of Kitchener's New Army K1 Army Group divisions , authorized on 21 August 1914, after the outbreak of the Great War. It included battalions from the various provinces of Ireland...
from Kitchener's New Army
Kitchener's Army
The New Army, often referred to as Kitchener's Army or, disparagingly, Kitchener's Mob, was an all-volunteer army formed in the United Kingdom following the outbreak of hostilities in the First World War...
Divisions plus the dismounted yeomanry
Yeomanry
Yeomanry is a designation used by a number of units or sub-units of the British Territorial Army, descended from volunteer cavalry regiments. Today, Yeomanry units may serve in a variety of different military roles.-History:...
of the 2nd Mounted Division
British 2nd Mounted Division
The 2nd Mounted Division, was a yeomanry division that served in the First World War. At the outbreak of war it was assigned to defence of the Norfolk coast. In March 1915 it formed a second-line duplicate of itself, the 2/2nd Mounted Division...
. The unfortunate 29th Division was also shifted from Helles to Suvla for one more push. The final British attempt to resuscitate the offensive came on 21 August with attacks at Scimitar Hill and Hill 60
Battle of Hill 60 (Gallipoli)
The Battle of Hill 60 was the last major assault of the Battle of Gallipoli. It was launched on 21 August 1915 to coincide with the attack on Scimitar Hill made from the Suvla front by General Stopford's British IX Corps. Hill 60 was a low knoll at the northern end of the Sari Bair range which...
. Control of these hills would have united the Anzac and Suvla fronts but neither battle achieved success. When fighting at Hill 60 ceased on 29 August, the battle for the Sari Bair heights, and indeed the battle for the peninsula, was effectively over.
Evacuation
Gallipoli
The Gallipoli peninsula is located in Turkish Thrace , the European part of Turkey, with the Aegean Sea to the west and the Dardanelles straits to the east. Gallipoli derives its name from the Greek "Καλλίπολις" , meaning "Beautiful City"...
peninsula. Troop numbers were progressively reduced from 7 December and cunning ruses were performed to fool the Turks and to prevent them from discovering the Allies that were departing. At Anzac, the troops would maintain utter silence for an hour or more until the curious Turks would venture out to inspect the trenches, whereupon the Anzacs would open fire. As the numbers in the trenches were thinned, rifles were rigged to fire by water dripped into a pan attached to the trigger. In what was ironically the best planned operation of the campaign, the evacuation was completed by dawn on 20 December 1915, without a single casualty.
Ultimately the Gallipoli campaign was a disastrous failure. It did not achieve any of the objectives that had been given as a justification for it, and due to the inexperience of high commanders and mismanagement there were an unacceptably high number of casualties amongst the participating troops, not only from as a result of combat, but also due to widespread disease that resulted from poor sanitation and hygiene in the front lines and a breakdown in the casualty clearance and resupply and logistics systems. It has been estimated that over the course of the campaign there were 26,111 Australian casualties with 8,141 killed. Other Allied casualties—killed and wounded—included: 7,571 New Zealanders, 120,000 British and 27,000 French.
After the war, the bad conditions and high casualties amongst the Anzac troops resulted in a reasonably prevalent view in Australia that these had been due to the incompetence of British officers commanding the Australian troops and their disregard for the casualties that resulted from poorly planned or ill-conceived attacks. Whether these claims are valid or not, there can be little doubt that the entire campaign was poorly conducted, and as a result there were many military lessons learnt that were to be applied in later campaigns. Despite this, for Australians and New Zealanders the Gallipoli campaign has come to symbolise an important milestone in the emergence of both nations as independent actors on the world stage and the development of a sense of national identity. Today, the date of the initial landings, 25 April, is a public holiday known as Anzac Day
ANZAC Day
Anzac Day is a national day of remembrance in Australia and New Zealand, commemorated by both countries on 25 April every year to honour the members of the Australian and New Zealand Army Corps who fought at Gallipoli in the Ottoman Empire during World War I. It now more broadly commemorates all...
in Australia and New Zealand and every year thousands of people gather at memorials in both nations, and indeed in Turkey, to honour the bravery and sacrifice of the original Anzacs, and of all those who have subsequently lost their lives in war.
Egypt and Palestine
After the Gallipoli Campaign, Australian troops returned to Egypt
Egypt
Egypt , officially the Arab Republic of Egypt, Arabic: , is a country mainly in North Africa, with the Sinai Peninsula forming a land bridge in Southwest Asia. Egypt is thus a transcontinental country, and a major power in Africa, the Mediterranean Basin, the Middle East and the Muslim world...
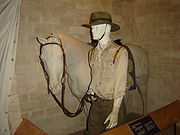
and the AIF underwent a major expansion, which involved the raising of another three infantry divisions—the 3rd, 4th and 5th—and the establishment of the Anzac Mounted Division. In March 1916 the infantry began to move to France while the cavalry units stayed in the area and fought Turkish troops and the Senussi Arab tribes that were threatening British control of Egypt. Mounted troops were particularly important in the defence of Egypt and Australian troops of the Anzac Mounted Division
Anzac Mounted Division
The ANZAC Mounted Division was a mounted infantry and mounted rifles division formed in March 1916 in Egypt during World War I following the Battle of Gallipoli when the Australian and New Zealand regiments returned from fighting dismounted as infantry...
saw action in all the major battles of the campaign, first seeing combat in the Battle of Romani
Battle of Romani
The Battle of Romani was fought east of the Suez Canal, near the Egyptian town of Romani and the site of ancient Pelusium on the Sinai Peninsula during the First World War...
. Apart from the horsemen, the mounted troops included the 1st Imperial Camel Corps
Imperial Camel Corps
The Imperial Camel Corps was a brigade-sized military formation which fought for the Allies in the Sinai and Palestine Campaign in World War I. Its personnel were infantry mounted on camels for movement across desert....
Brigade. This was organised as a mounted infantry brigade. Of its four battalions, the 1st and 3rd were composed of Australians, the 2nd was British, and the 4th was half Australian and half New Zealand. The cameliers participated in most of the fighting in Egypt and Palestine until the brigade was disbanded in July 1918. The Australian and New Zealand components then traded their camels for horses and became the 5th Light Horse Brigade.
Fighting the Senussi Arabs
In response to the growing threat from a pro-Turkish Islamic Arab sect known as the SenussiSenussi
The Senussi or Sanussi refers to a Muslim political-religious order in Libya and the Sudan region founded in Mecca in 1837 by the Grand Senussi, Sayyid Muhammad ibn Ali as-Senussi. Senussi was concerned with both the decline of Islamic thought and spirituality and the weakening of Muslim political...
, a composite British force—the "Western Frontier Force"—under the command of the British Indian Army
British Indian Army
The British Indian Army, officially simply the Indian Army, was the principal army of the British Raj in India before the partition of India in 1947...
officer Major General Alexander Wallace, was sent into the Libyan Desert
Libyan Desert
The Libyan Desert covers an area of approximately 1,100,000 km2, it extends approximately 1100 km from east to west, and 1,000 km from north to south, in about the shape of a rectangle...
to Mersa Matruh in late-November 1915. This force included a composite regiment of Australian light horse and the horse transport of the 1st Division. A series of sharp battles against the Arabs ensued at Um Rakhum, Gebel Medwa and Halazin during December and January. British casualties were comparatively light, although many were killed or wounded, including Australians. Arab losses were much higher however, with hundreds killed during the fighting. Meanwhile a number of the Australian Light Horse units returning from Gallipoli were sent further south to guard the edge of the Nile Valley against the Senussi. The 1st Armoured Car Section was also involved in guarding the Western Desert until it was sent to Palestine as the 1st Light Car Patrol at the end of 1916.
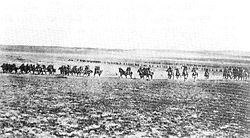
Battle of Romani
The Battle of Romani took place near the Egyptian town of Romani which lies 23 miles (37 km) east of the Suez CanalSuez Canal
The Suez Canal , also known by the nickname "The Highway to India", is an artificial sea-level waterway in Egypt, connecting the Mediterranean Sea and the Red Sea. Opened in November 1869 after 10 years of construction work, it allows water transportation between Europe and Asia without navigation...
from 3–5 August 1916. The goal of Turkish army was to control or destroy the Suez Canal, thereby denying the use of the waterway to the Allies
Allies
In everyday English usage, allies are people, groups, or nations that have joined together in an association for mutual benefit or to achieve some common purpose, whether or not explicit agreement has been worked out between them...
and in doing so aiding the Central Powers
Central Powers
The Central Powers were one of the two warring factions in World War I , composed of the German Empire, the Austro-Hungarian Empire, the Ottoman Empire, and the Kingdom of Bulgaria...
. Both the Anzac Mounted Division, under Major General Chauvel, and the 52nd (Lowland) Division saw action against the Turkish division.
Since first making contact with the Turks on 20 July they had been harassed alternately by the Australian 1st and 2nd Light Horse Brigades but on the night of 3–4 August both brigades were involved. By about midday on 4 August, the Turkish division had pushed the two Australian brigades back to a point where the 52nd Infantry Division, in their trenches, were able to attack the Turkish right flank, and the New Zealand Mounted Rifle and 5th Mounted Brigades arrived to extend the Australians' line on the left flank. The Turkish advance was stopped by the fire brought to bear on them by these combined British infantry and Australian, British and New Zealand mounted forces and the deep sand, the midday summer heat, and thirst.
In these extremely tough conditions, the British infantry were unable to move effectively against the enemy the next day, and the Anzac Mounted Division was unable to stop the Turks making an orderly retreat to Katia and eventually back to their base at Bir el Abd. This base was abandoned on 12 August 1916 ending any threat to the Suez Canal for the remainder of the war. The battle cost the Allies 1,202 casualties of which 222 were killed, 71 died of wounds and 909 were wounded; half of these were Australians.
Battle of Magdhaba
Following the victory at Romani the Anzac Mounted DivisionAnzac Mounted Division
The ANZAC Mounted Division was a mounted infantry and mounted rifles division formed in March 1916 in Egypt during World War I following the Battle of Gallipoli when the Australian and New Zealand regiments returned from fighting dismounted as infantry...
pushed the Ottoman Army back across the Sinai Peninsula. The Turkish forces had been put on the defensive and retreated from Bir el Abd on 12 August 1916 towards the Egyptian–Ottoman Empire frontier; fighting a successful rearguard action at Bir el Mazar before retiring to El Arish in September, and in the Maghara Hills
Sinai and Palestine Campaign
The Sinai and Palestine Campaigns took place in the Middle Eastern Theatre of World War I. A series of battles were fought between British Empire, German Empire and Ottoman Empire forces from 26 January 1915 to 31 October 1918, when the Armistice of Mudros was signed between the Ottoman Empire and...
in October 1916 when a strongly defended position was attacked by an Allied force based on the Suez Canal. Both places were subsequently abandoned. During November, an aerial bombing raid by 5 B.E.'s and a Martinsyde, the largest air attack yet organised in the East was carried out on Beersheba
Beersheba
Beersheba is the largest city in the Negev desert of southern Israel. Often referred to as the "Capital of the Negev", it is the seventh-largest city in Israel with a population of 194,300....
. By the beginning of December the railway had reached El Mazar along with lines of communication garrisons, support and services and it became possible to plan for an advance to El Arish.
On 21 December after a night march of 30 miles the Anzac Mounted Division
Anzac Mounted Division
The ANZAC Mounted Division was a mounted infantry and mounted rifles division formed in March 1916 in Egypt during World War I following the Battle of Gallipoli when the Australian and New Zealand regiments returned from fighting dismounted as infantry...
commanded by Major General Chauvel entered El Arish, which had been abandoned by the Turks, who had retreated to Madghaba where the mounted force won a fierce daylong engagement against strong well constructed defences manned by determined defenders.
Major General Chauvel with the agreement of General Chetwode
Philip Chetwode, 1st Baron Chetwode
Field Marshal Philip Walhouse Chetwode, 1st Baron Chetwode, 7th Baronet of Oakley, GCB, OM, GCSI, KCMG, DSO was a British cavalry officer who became Commander in Chief in India.-Early life and education:...
commanding Desert Column who had arrived that day, set out to attack the Turkish forces at Magdhaba with the Anzac Mounted Division
Anzac Mounted Division
The ANZAC Mounted Division was a mounted infantry and mounted rifles division formed in March 1916 in Egypt during World War I following the Battle of Gallipoli when the Australian and New Zealand regiments returned from fighting dismounted as infantry...
. Leaving at about midnight on 22 December, the Anzac Mounted Division was in a position by 0350 on 23 December, to see enemy fires still some miles away at Magdhaba.
With the 1st Light Horse Brigade
1st Light Horse Brigade
The 1st Light Horse Brigade was a mounted infantry brigade of the First Australian Imperial Force which served in the Middle Eastern theatre of World War I. The brigade first saw action during the Dardanelles Campaign in the Battle of Gallipoli. After being withdrawn to Egypt in February 1916 they...
in reserve, Major General Chauvel sent the New Zealand Mounted Rifles
New Zealand Mounted Rifles Brigade
The New Zealand Mounted Rifles Brigade, consisting usually of four units of mounted infantry, fought in World War I and World War II. Initially a milita, under the instruction of Lieutenant Colonel Joseph Henry Banks they formed the core of the New Zealand Army following successful service in the...
and the 3rd Light Horse Brigade
3rd Light Horse Brigade
The 3rd Light Horse Brigade was a mounted infantry brigade of the First Australian Imperial Force which served in the Middle Eastern theatre of World War I....
s to move on Magdhaba by the north and north–east to cut off the possibility of retreat while the Imperial Camel Corps
Imperial Camel Corps
The Imperial Camel Corps was a brigade-sized military formation which fought for the Allies in the Sinai and Palestine Campaign in World War I. Its personnel were infantry mounted on camels for movement across desert....
Brigade followed the telegraph line straight on Magdhaba. The 1st Light Horse Brigade reinforced the Imperial Camel Corps Brigade in an attack on the redoubt but fierce shrapnel fire forced them to advance up the wadi bed. By midday all three brigades and the Camel Brigade, with Vickers and Lewis Gun sections and HAC artillery were hotly engaged. Aerial reconnaissance to scout out the Turkish positions greatly assisted the attack, although enemy positions were well camouflaged.
When the fighting began the going was tough and by one o'clock in the afternoon, after hearing that the enemy still had possession of most of the water in the area, its claimed Major General Chauvel decided to call off the attack. In any case, after a telephone call between Major General Chauvel and Lieutenant General Chetwode pressure was continued to be pressed and an attack by all units took place by which time there was no doubt that the enemy was losing the fight. Both the 1st Light Horse and the New Zealand Mounted Rifle Brigades made progress capturing about 100 prisoners and by 3.30 pm the Turks were beginning to surrender. By 4:30 pm, the Turkish garrison surrendered, having suffered heavy casualties, and the town was captured. The victory had cost 22 dead and 121 wounded.
Battle of Rafa
Two and a half weeks later, on the evening of 8 January 1917 the mounted units of Desert Column commanded by Lieutenant General ChetwodePhilip Chetwode, 1st Baron Chetwode
Field Marshal Philip Walhouse Chetwode, 1st Baron Chetwode, 7th Baronet of Oakley, GCB, OM, GCSI, KCMG, DSO was a British cavalry officer who became Commander in Chief in India.-Early life and education:...
rode out of El Arish towards Rafa where a 2,000-strong Turkish garrison was based. The attacking force comprised the Australian 1st Light Horse Brigade
1st Light Horse Brigade
The 1st Light Horse Brigade was a mounted infantry brigade of the First Australian Imperial Force which served in the Middle Eastern theatre of World War I. The brigade first saw action during the Dardanelles Campaign in the Battle of Gallipoli. After being withdrawn to Egypt in February 1916 they...
, 3rd Light Horse Brigade
3rd Light Horse Brigade
The 3rd Light Horse Brigade was a mounted infantry brigade of the First Australian Imperial Force which served in the Middle Eastern theatre of World War I....
and the New Zealand Mounted Rifles Brigade of the Anzac Mounted Division
Anzac Mounted Division
The ANZAC Mounted Division was a mounted infantry and mounted rifles division formed in March 1916 in Egypt during World War I following the Battle of Gallipoli when the Australian and New Zealand regiments returned from fighting dismounted as infantry...
under the command of Major General Chauvel, the British 5th Mounted (Yeomanry) Brigade and three battalions of the Imperial Camel Corps Brigade.
After a long night march, the Allied force attacked the strongly entrenched position at El Magruntein. A fierce day-long battle resulted in the mounted troops (fighting dismounted) capturing the town around nightfall with the loss of 71 killed and 415 wounded. The Turkish garrison suffered heavily, with 200 killed and another 1,600 taken prisoner.
Fighting around Gaza, 1917
In early 1917, the Imperial Mounted Division was formed from the 3rd and 4th Light Horse Brigade4th Light Horse Brigade
The 4th Light Horse Brigade was a mounted infantry brigade of the First Australian Imperial Force serving in the Middle Eastern theatre of World War I. The brigade was formed in March 1915 and shipped to Egypt without their horses and was broken up in Egypt in August 1915...
s and two British mounted brigades. The division first saw service during the First Battle of Gaza
First Battle of Gaza
The First Battle of Gaza was fought in and around the town of Gaza on the Mediterranean coast in the southern region of Ottoman Palestine on 26 March 1917, during World War I...
, which occurred in southern Gaza
Gaza
Gaza , also referred to as Gaza City, is a Palestinian city in the Gaza Strip, with a population of about 450,000, making it the largest city in the Palestinian territories.Inhabited since at least the 15th century BC,...
on 26 March 1917. At around noon two mounted brigades of the Anzac Mounted Division attacked Gaza from the north and east. At 6.00 pm the Turkish position had become perilous with the ring closing tightly around Gaza. However, in a decision that dismayed most of their soldiers the British commanders decided to call off the attack and retreat, delivering victory to the Turks. A second attempt was made to capture Gaza on 19 April by which time the Turkish defences were even more formidable and the task confronting the British even more difficult. This battle became known as the Second Battle of Gaza
Second Battle of Gaza
The Second Battle of Gaza, fought in southern Palestine during the First World War, was another attempt mounted by British Empire forces to break Ottoman defences along the Gaza-Beersheba line...
. The Anzac Mounted Division played only a minor role in this battle suffering only 105 casualties out of the 5,917 suffered. The second battle of Gaza was a disastrous defeat for the Allied forces.
Australian Mounted Division
The Australian Mounted Division was a mounted infantry division formed in Egypt during World War I. When the British forces in the Middle East expanded in late 1916, a second mounted division was created called the Imperial Mounted Division...
. In August 1917 Chauvel was placed in command of the Desert Mounted Corps
Desert Mounted Corps
The Desert Mounted Corps was a World War I Allied army corps that operated in the Middle East during 1917 and 1918.Originally formed on 15 March 1916 as the Australian and New Zealand Mounted Division under the command of Major General Harry Chauvel The Desert Mounted Corps was a World War I...
, which included the two Australian mounted divisions, as well as the British Yeomanry Division and the Imperial Camel Corps Brigade. Chauvel became the first Australian to command a corps, as well as the first to achieve the rank of lieutenant-general.
With the failure of the Second Battle of Gaza a third assault
Third Battle of Gaza
The Third Battle of Gaza was fought in 1917 in southern Palestine during the First World War. The British Empire forces under the command of General Edmund Allenby successfully broke the Ottoman defensive Gaza-Beersheba line...
was launched on Gaza between 31 October and 7 November 1917. Units from the Anzac Mounted Division and the Australian Mounted Division took part in the battle. The battle was a complete success for the Allies. The Gaza–Beersheba line was completely overrun and 12,000 Turkish soldiers were captured or surrendered. The critical moment of the battle was the capture of the town of Beersheba on the first day by Australian light horsemen. The Australian 4th Light Horse Brigade, under Brigadier General William Grant
William Grant (General)
Brigadier General William Grant CMG, DSO and Bar, MBE was an Australian Army colonel and temporary Brigadier General in World War I.-Early life and career:...
, charged more than 4 miles (6.4 km) at the Turkish trenches, overran them and captured the wells at Beersheba. In the capture of Beersheba, the Australians lost 31 men killed. A further 32 were wounded, while 80 horses were lost. On the Turkish side, more than 500 men were killed and 1,500 captured as well as nine artillery pieces and a number of machine guns and other pieces of equipment.
Fighting advance
From 1 to 7 November, strong Ottoman rearguards at Tel el Khuweilfe in the southern Judean Hills, at Hareira and Sheria on the maritime plain and at Sausage RidgeSecond Battle of Gaza
The Second Battle of Gaza, fought in southern Palestine during the First World War, was another attempt mounted by British Empire forces to break Ottoman defences along the Gaza-Beersheba line...
and Gaza
Gaza
Gaza , also referred to as Gaza City, is a Palestinian city in the Gaza Strip, with a population of about 450,000, making it the largest city in the Palestinian territories.Inhabited since at least the 15th century BC,...
close to the Mediterranean
Mediterranean Sea
The Mediterranean Sea is a sea connected to the Atlantic Ocean surrounded by the Mediterranean region and almost completely enclosed by land: on the north by Anatolia and Europe, on the south by North Africa, and on the east by the Levant...
coast, held the Egyptian Expeditionary Force
Egyptian Expeditionary Force
The Egyptian Expeditionary Force was formed in March 1916 to command the British and British Empire military forces in Egypt during World War I. Originally known as the 'Force in Egypt' it had been commanded by General Maxwell who was recalled to England...
in heavy fighting. During this time the Ottoman Army was able to withdraw in good order. The rearguard garrisons themselves were also able to retire under cover of darkness, during the night of 6/7 or 7/8 November.
On 7 and 8 November the surviving units of the 7th
Seventh Army (Ottoman Empire)
The Ottoman Seventh Army was a large military formation of Ottoman Empire in the late 19th and early 20th centuries. Although designated as an army, at least by 1918, it was only of corps strength....
and 8th
Eighth Army (Ottoman Empire)
The Eighth Army of the Ottoman Empire was one of the field armies of the Ottoman Army. It was formed during the World War I.- Order of Battle, January 1918 :In January 1918, the army was structured as follows:...
Ottoman armies further delayed the advance of Desert Mounted Corps
Desert Mounted Corps
The Desert Mounted Corps was a World War I Allied army corps that operated in the Middle East during 1917 and 1918.Originally formed on 15 March 1916 as the Australian and New Zealand Mounted Division under the command of Major General Harry Chauvel The Desert Mounted Corps was a World War I...
commanded by Lieutenant General
Lieutenant General (Australia)
Lieutenant general is the second-highest active rank of the Australian Army and was created as a direct equivalent of the British military rank of lieutenant general. It is also considered a three-star rank....
Henry George Chauvel and the XXI Corps
XXI Corps (United Kingdom)
The XXI Corps was a Army Corps of the British Army during World War I.-First World War:The Corps was formed in Egypt in June 1917 under the command of Lieutenant General Edward Bulfin...
's 52nd (Lowland) Infantry Division commanded by Major General
Major General
Major general or major-general is a military rank used in many countries. It is derived from the older rank of sergeant major general. A major general is a high-ranking officer, normally subordinate to the rank of lieutenant general and senior to the ranks of brigadier and brigadier general...
Edmund Hakewill-Smith
Edmund Hakewill-Smith
Major-General Sir Edmund Hakewill-Smith KCVO, CB, CBE, MC was a South African-born British General.-Early life:Hakewill-Smith was born in Kimberley, Northern Cape, South Africa, on the 17 March 1896, he was educated at the Diocesan College in Rondebosch, Cape Town, South Africa and at the RMC...
and the 75th Yeomanry Infantry Division
75th Division (United Kingdom)
The 75th Division was a war formed division of the British Army during World War I. They served in the Middle East during the Sinai and Palestine Campaign being involved in the Battle of Megiddo .-Formation 1918:Commander Major General P C Palin...
commanded by Major General P. C. Palin.
All other units of the Egyptian Expeditionary Force
Egyptian Expeditionary Force
The Egyptian Expeditionary Force was formed in March 1916 to command the British and British Empire military forces in Egypt during World War I. Originally known as the 'Force in Egypt' it had been commanded by General Maxwell who was recalled to England...
had come to the end of their lines of communication
Line of communication
A line of communication is the route that connects an operating military unit with its supply base. Supplies and reinforcements are transported along the line of communication. Therefore, a secure and open line of communication is vital for any military force to continue to operate effectively...
. These units were the XXI Corps' 54th (East Anglian) Infantry Division resting at Gaza and the Imperial Service Cavalry Brigade at Beit Hanun. Also in the rear was the whole of Lieutenant General Philip Chetwode's
Philip Chetwode, 1st Baron Chetwode
Field Marshal Philip Walhouse Chetwode, 1st Baron Chetwode, 7th Baronet of Oakley, GCB, OM, GCSI, KCMG, DSO was a British cavalry officer who became Commander in Chief in India.-Early life and education:...
XX Corps which had transferred its transport to XXI Corps. Its 53rd (Welsh) Infantry Division (commanded by Major General S. F. Mott) and corps cavalry, together with the New Zealand Mounted Rifles Brigade, were deployed in the front line near Tel el Khuweilfe, in the Judean Hills north of Beersheba. While its 60th (London) Infantry Division
60th (2/2nd London) Division
The British 60th Division was the second of two second-line Territorial Force divisions formed from the surplus of London recruits in 1914. Originally the division merely supplied the first-line Territorial divisions with drafts to replace losses through casualties...
(commanded by Major General J. S. M. Shea) was resting at Huj, its 10th (Irish) Infantry Division (commanded by Major General J. R. Longley) and 74th Infantry Division (commanded by Major General E. S. Girdwood) were both resting back at Karm.
Desert Mounted Corps and the two infantry divisions of XX Corps commanded by Lieutenant General
Lieutenant General
Lieutenant General is a military rank used in many countries. The rank traces its origins to the Middle Ages where the title of Lieutenant General was held by the second in command on the battlefield, who was normally subordinate to a Captain General....
Edward Bulfin
Edward Bulfin
Lieutenant General Sir Edward Stanislaus Bulfin KCB CVO was a British general during World War I, where he established a reputation as an excellent commander at the brigade, divisional and corps levels...
became involved in a series of engagements during the days leading up to the battle and on the day after. These began on 10 November when one brigade of the 52nd (Lowland) Infantry Division (commanded by Major General J. Hill) and two brigades of the Anzac Mounted Division (commanded by Major General Edward Chaytor
Edward Chaytor
Major General Sir Edward Walter Clervaux Chaytor KCMG, KCVO, CB was a farmer, and a military commander of New Zealand troops in the Boer War and World War I....
) successfully pushed across the Nahr Sukereir
Arab Suqrir
Arab Suqrir was a Palestinian Arab village in the District of Gaza, located northeast of Gaza in a flat area with an elevation of along the coastal plain just north of Isdud. The total land area of the village was 40,224 dunams, of which 12,270 was Arab-owned, while the remainder was public...
to establish a bridgehead on the Ottoman right flank. And three brigades of the Australian Mounted Division (commanded by Major General Henry W. Hodgson) ran into the Ottoman rearguard's left flank around the village of Summeil. The mounted troops occupied the village on 11 November but were unable to advance further due to intense Ottoman artillery fire which continued throughout the day. On 12 November Allenby made preparations for battle the following day. He ordered an attack by the 52nd (Lowland) Infantry Division to extend their position across the Nahr Sukereir on the Ottoman Army's right flank. And reinforced with two additional brigades, he ordered the Australian Mounted Division to advance towards Tel es Safi where they encountered a determined and substantial Ottoman counterattack. This counterattack forced the mounted division to concede the territory gained during the day, before fighting the Ottoman Army to a standstill in front of Summeil. On the morning after the battle at Mughar Ridge, Junction Station was occupied and during the following days other villages in the area were found to have been abandoned. Later in the morning of 14 November New Zealand Mounted Rifles Brigade
New Zealand Mounted Rifles Brigade
The New Zealand Mounted Rifles Brigade, consisting usually of four units of mounted infantry, fought in World War I and World War II. Initially a milita, under the instruction of Lieutenant Colonel Joseph Henry Banks they formed the core of the New Zealand Army following successful service in the...
(commanded by Brigadier General
Brigadier General
Brigadier general is a senior rank in the armed forces. It is the lowest ranking general officer in some countries, usually sitting between the ranks of colonel and major general. When appointed to a field command, a brigadier general is typically in command of a brigade consisting of around 4,000...
William Meldrum) ran into a determined and well entrenched Ottoman rearguard near Ayun Kara, which they attacked. Fierce close quarter fighting against the Ottoman 3rd Infantry Division continued during the afternoon. Although severely threatened, the New Zealand Mounted Rifle Brigade eventually prevailed and went on to occupy Jaffa two days later.
The Battle of Mughar Ridge was fought on 13 November by the 52nd (Lowland) Infantry Division and the 75th Infantry Division
75th Division (United Kingdom)
The 75th Division was a war formed division of the British Army during World War I. They served in the Middle East during the Sinai and Palestine Campaign being involved in the Battle of Megiddo .-Formation 1918:Commander Major General P C Palin...
in the centre, with the Australian Mounted Division
Australian Mounted Division
The Australian Mounted Division was a mounted infantry division formed in Egypt during World War I. When the British forces in the Middle East expanded in late 1916, a second mounted division was created called the Imperial Mounted Division...
on their right flank and the Australian and New Zealand (Anzac)
Anzac Mounted Division
The ANZAC Mounted Division was a mounted infantry and mounted rifles division formed in March 1916 in Egypt during World War I following the Battle of Gallipoli when the Australian and New Zealand regiments returned from fighting dismounted as infantry...
and Yeomanry Mounted Divisions on the infantry's left flank. The battle was divided into two stages with a pause for artillery to be brought forward. Following the Yeomanry's successful charge up onto El Mughar
Al-Maghar
al-Maghar was a Palestinian Arab village in the District of Ramla. It was depopulated by the Givati Brigade during Operation Barak on 18 May 1948. It was located 12 km southwest of Ramla, situated north of Wadi al-Maghar....
ridge, two crucial fortified villages were captured by elements of the 52nd (Lowland) Infantry Division. This victory resulted in the subsequent occupation of Junction Station, a vital railway station on the Ottoman Empire
Ottoman Empire
The Ottoman EmpireIt was usually referred to as the "Ottoman Empire", the "Turkish Empire", the "Ottoman Caliphate" or more commonly "Turkey" by its contemporaries...
's lines of communication
Line of communication
A line of communication is the route that connects an operating military unit with its supply base. Supplies and reinforcements are transported along the line of communication. Therefore, a secure and open line of communication is vital for any military force to continue to operate effectively...
between Jaffa
Jaffa
Jaffa is an ancient port city believed to be one of the oldest in the world. Jaffa was incorporated with Tel Aviv creating the city of Tel Aviv-Yafo, Israel. Jaffa is famous for its association with the biblical story of the prophet Jonah.-Etymology:...
and Jerusalem.
Jerusalem operations
These operations (all described in the Battle of Jerusalem (1917) article) include two battles fought in the Judean Hills; the Battle of Nebi Samwil from 17 to 24 November and the Defence of Jerusalem from 26 to 30 December and another fought on the maritime plain; the subsidiary Battle of JaffaJaffa
Jaffa is an ancient port city believed to be one of the oldest in the world. Jaffa was incorporated with Tel Aviv creating the city of Tel Aviv-Yafo, Israel. Jaffa is famous for its association with the biblical story of the prophet Jonah.-Etymology:...
on 21–22 December 1917. This series of battles involved the British Empire
British Empire
The British Empire comprised the dominions, colonies, protectorates, mandates and other territories ruled or administered by the United Kingdom. It originated with the overseas colonies and trading posts established by England in the late 16th and early 17th centuries. At its height, it was the...
's XX Corps, XXI Corps and the Desert Mounted Corps fighting the Ottoman
Ottoman Empire
The Ottoman EmpireIt was usually referred to as the "Ottoman Empire", the "Turkish Empire", the "Ottoman Caliphate" or more commonly "Turkey" by its contemporaries...
7th Army
Seventh Army (Ottoman Empire)
The Ottoman Seventh Army was a large military formation of Ottoman Empire in the late 19th and early 20th centuries. Although designated as an army, at least by 1918, it was only of corps strength....
in the Judean Hills and the 8th Army
Eighth Army (Ottoman Empire)
The Eighth Army of the Ottoman Empire was one of the field armies of the Ottoman Army. It was formed during the World War I.- Order of Battle, January 1918 :In January 1918, the army was structured as follows:...
north of Jaffa on the Mediterranean coast.
After the failure of widespread and determined Ottoman counterattacks fought from 27 November to 1 December by the 7th Ottoman Army they evacuated Jerusalem. Towards the end of December the British Empire forces at the Battle of Jaffa and the Defence of Jerusalem succeeded in pushing the Ottoman armies well to the north of these places. A new strategically strong British defensive line was established which remained in place until mid September 1918. The line stretched across from well north of the Nahr el Auja on the Mediterranean coast in the west to north and east of Jerusalem. It was extended during the middle of February 1918 when Jericho in the Jordan Valley was captured and the eastern end of the line was secured on the Dead Sea.
The Australian mounted troops took part in the Battle of Mughar Ridge
Battle of Mughar Ridge
The Battle of El Mughar Ridge , took place on 13 November 1917 during the Sinai and Palestine Campaign of the First World War...
and the Capture of Jerusalem
Battle of Jerusalem (1917)
The Battle of Jerusalem developed from 17 November with fighting continuing until 30 December 1917 during the Sinai and Palestine Campaign of World War I...
in late 1917. Troops from the Australian Mounted Division were the first mounted troops to enter Jerusalem in December 1917.
Transjordan operations
In March and April 1918, Australian and New Zealand mounted troops and British infantry took part in two raids east across the Jordan River to Amman and Es Salt, a village in Palestine 23 kilometres (14.3 mi) west of AmmanAmman
Amman is the capital of Jordan. It is the country's political, cultural and commercial centre and one of the oldest continuously inhabited cities in the world. The Greater Amman area has a population of 2,842,629 as of 2010. The population of Amman is expected to jump from 2.8 million to almost...
. Although these raids were unsuccessful, they encouraged Turkish commanders to believe that the main British effort would be launched across the Jordan when it would be launched along the coastal plain.
Before these operations could commence it was necessary to capture the country east of Jerusalem and into the Jordan Valley to Jericho. The attack on the Ottoman 26th and 53rd Infantry Divisions was made by the 60th (London) Infantry and the Anzac Mounted Divisions on 19 February. Talat ed Dumm, on the road from Jerusalem, was captured the next day and in the evening the Wady Fara and Nebi Musa were also captured. On 21 February Jericho was occupied by the two divisions of the Egyptian Expeditionary Force
Egyptian Expeditionary Force
The Egyptian Expeditionary Force was formed in March 1916 to command the British and British Empire military forces in Egypt during World War I. Originally known as the 'Force in Egypt' it had been commanded by General Maxwell who was recalled to England...
.
Final offensive
During the final offensive in September 1918, the two divisions of Australian mounted troops, as well as the 1st Light Car Patrol and No. 1 Squadron AFC, took part in Battle of MegiddoBattle of Megiddo (1918)
The Battle of Megiddo took place between 19 September and 1 October 1918, in what was then the northern part of Ottoman Palestine and parts of present-day Syria and Jordan...
on 28 September 1918, a decisive British victory in which 70,000 Turkish soldiers were taken prisoner. The Desert Mounted Corps attacked across the Golan Heights, cutting off the north and north-west exits to Damascus on 29 September. On 30 September, the head of a column of 20,000 Turkish and German troops was annihilated by the Australian light horsemen as it attempted to withdraw west through the Barada Gorge. Australian troops were the first to enter Damascus, which fell on 1 October. Following an advance of 300 kilometres (186.4 mi), Aleppo
Aleppo
Aleppo is the largest city in Syria and the capital of Aleppo Governorate, the most populous Syrian governorate. With an official population of 2,301,570 , expanding to over 2.5 million in the metropolitan area, it is also one of the largest cities in the Levant...
was captured on 25 October. The Turkish government signed an armistice on 28 October 1918 and surrendered outright
Armistice of Mudros
The Armistice of Moudros , concluded on 30 October 1918, ended the hostilities in the Middle Eastern theatre between the Ottoman Empire and the Allies of World War I...
two days later.
Following the armistice, the Australian Mounted Division went into camp at Tripoli
Tripoli, Lebanon
Tripoli is the largest city in northern Lebanon and the second-largest city in Lebanon. Situated 85 km north of the capital Beirut, Tripoli is the capital of the North Governorate and the Tripoli District. Geographically located on the east of the Mediterranean, the city's history dates back...
while the Anzac Mounted Division, having borne the brunt of the entire campaign, suffered heavily from malaria and influenza in the Jordan Valley. Australia's role in the Sinai and Palestine campaign was later acknowledged by Field Marshal Edmund Allenby
Edmund Allenby, 1st Viscount Allenby
Field Marshal Edmund Henry Hynman Allenby, 1st Viscount Allenby GCB, GCMG, GCVO was a British soldier and administrator most famous for his role during the First World War, in which he led the Egyptian Expeditionary Force in the conquest of Palestine and Syria in 1917 and 1918.Allenby, nicknamed...
, who had been commander-in-chief of the Allied forces in the Middle East, as having been considerable.
Western Front
.jpg)
Western Front (World War I)
Following the outbreak of World War I in 1914, the German Army opened the Western Front by first invading Luxembourg and Belgium, then gaining military control of important industrial regions in France. The tide of the advance was dramatically turned with the Battle of the Marne...
. Initially they were organised into I Anzac Corps
I Anzac Corps
The I ANZAC Corps was a combined Australian and New Zealand army corps that served during World War I.It was formed in Egypt in February 1916 as part of the reorganisation and expansion of the Australian Imperial Force and the New Zealand Expeditionary Force following the evacuation of Gallipoli...
and II Anzac Corps
II Anzac Corps
The II ANZAC Corps was an Australian and New Zealand First World War army corps formed in Egypt in February 1916 as part of the reorganization of the Australian Imperial Force following the evacuation of Gallipoli in November 1915, under the command of William Birdwood...
alongside the New Zealand Division
New Zealand Division
The New Zealand Division was a World War I infantry division formed in Egypt in January 1916 following the evacuation of Gallipoli. At the outbreak of war the New Zealand Expeditionary Force contained a single infantry brigade which was combined with the unattached Australian 4th Infantry Brigade...
, however, on 1 November 1917 the Australian divisions were re-grouped together to form the Australian Corps
Australian Corps
The Australian Corps was a World War I army corps that contained all five Australian infantry divisions serving on the Western Front. It was the largest corps fielded by the British Empire army in France...
. The 2nd Division was the first to arrive in France, followed by the 1st Division
1st Division (Australia)
The 1st Division is the main formation of the Australian Army and contains the majority of the army's regular forces. Its headquarters is in Enoggera, a suburb of Brisbane...
, while the 4th and 5th left Egypt later in June 1916. The 3rd Division was the last to arrive, having been formed in Australia in March 1916, and moving to England for training in July 1916, before being sent to France in December 1916.
They were not the first Australians to serve on the Western Front. An Australian Volunteer Hospital had been formed in England in August 1914 from Australian expatriates. All medical practitioners in the unit were Australians and although women were not allowed to serve as doctors, Australian nurses were accepted. The unit left for France in August 1914 and from October was based at Wimereux
Wimereux
Wimereux is a commune in the Pas-de-Calais department in the Nord-Pas-de-Calais region of France.-Geography:Wimereux is a coastal town situated some north of Boulogne, at the junction of the D233 and the D940 roads, on the banks of the river Wimereux. The river Slack forms the northern boundary of...
, where the 2nd General Hospital joined it in June 1916. In July 1916, the Australian Volunteer Hospital was absorbed into the British Army.

Salisbury Plain
Salisbury Plain is a chalk plateau in central southern England covering . It is part of the Southern England Chalk Formation and largely lies within the county of Wiltshire, with a little in Hampshire. The plain is famous for its rich archaeology, including Stonehenge, one of England's best known...
and hauled gravel for roads before being sent to France in July 1915.
Another group of Australians had also arrived in France before I Anzac Corps. In June 1915, the 1st Siege Artillery Brigade was formed under the command of Lieutenant Colonel Walter Adams Coxen
Walter Adams Coxen
Major General Walter Adams Coxen CB, CMG, DSO was an Australian Army Major General in World War I. In April 1930 Coxen was promoted to the position of Chief of General Staff. He retired in 1931.-Early life and career:...
, the Australian Army's Director of Artillery, for service on the Western Front. About half the men in the unit were permanent gunners of the Garrison Artillery. The brigade departed Melbourne for England on 17 July 1915 and landed in France on 27 February 1916. Its 54th Siege Battery was equipped with 8 inch howitzers
BL 8 inch Howitzer Mk 1 - 5
The BL 8-Inch Howitzer Mark I through to Mark V were a British improvisation developed early in the First World War to provide heavy artillery...
and its 55th Siege Battery with 9.2 inch howitzers
BL 9.2 inch Howitzer
The Ordnance BL 9.2 inch howitzer was the principal counter-battery equipment of British forces in France in World War I. It equipped a substantial number of siege batteries of the Royal Garrison Artillery...
.
On 7 April 1916, I Anzac Corps took up positions in a quiet sector south of Armentieres
Armentières
Armentières is a commune in the Nord department in the Nord-Pas-de-Calais region in northern France. It is part of the Urban Community of Lille Métropole, and lies on the Belgian border, northwest of the city of Lille, on the right bank of the river Lys....
, known as the "Nursery". For the next two and a half years the constant rotations in and out of the line were punctuated by a number of major battles, during which the Australians earned for themselves a formidable reputation.
Base in the United Kingdom
With the move of the majority of the AIF to France, the base organisation was transferred to the United Kingdom. Most of the training units moved to the Salisbury PlainSalisbury Plain
Salisbury Plain is a chalk plateau in central southern England covering . It is part of the Southern England Chalk Formation and largely lies within the county of Wiltshire, with a little in Hampshire. The plain is famous for its rich archaeology, including Stonehenge, one of England's best known...
, establishing depots at Perham Down
Perham down
Perham Down is a village located near Ludgershall and Tidworth, located on the edge of Salisbury Plain about 10 miles outside Andover, and is often referred by locals as Perham.-Army:...
, Rollestone, Larkhill
Larkhill
Larkhill is a garrison town in the civil parish of Durrington, Wiltshire, England. It is a short distance west of Durrington village proper and north of the prehistoric monument of Stonehenge. It is about north of Salisbury....
and Tidworth
Tidworth
Tidworth is a town in south-east Wiltshire, England with a growing civilian population. Situated at the eastern edge of Salisbury Plain, it is approximately 10 miles west of Andover, 12 miles south of Marlborough, 24 miles south of Swindon, 15 miles north by north-east of Salisbury and 6 miles east...
. When it arrived, the 3rd Division also moved into camps in this area. Command Depots, where men returning from hospitals were sent before being returned to their units, were established at Perham Down, Weymouth, Wool, Dorset
Wool, Dorset
Wool is a village in the Purbeck district of Dorset, England. The village has a population of 4,118 , though the population has fluctuated over the past 15 years, due to the proximity of military institutions, reaching a high of 4,300 in 1992. The village lies at a historic bridging point on the...
and Worgret
Worgret
Worgret is a village in the English county of Dorset. It is situated immediately to the west of the town of Wareham.Worgret forms part of the civil parish of Arne, within the Purbeck local government district.-External links:...
. Depots for men moving from the United Kingdom to France were established at Étaples
Étaples
Étaples or Étaples-sur-Mer is a commune in the Pas-de-Calais department in northern France. It is a fishing and leisure port on the Canche river.There is a separate commune named Staple, Nord.-History:...
. In June 1917, these were swapped with the Canadians for depots around Le Havre
Le Havre
Le Havre is a city in the Seine-Maritime department of the Haute-Normandie region in France. It is situated in north-western France, on the right bank of the mouth of the river Seine on the English Channel. Le Havre is the most populous commune in the Haute-Normandie region, although the total...
, thereby reducing travelling time from the Salisbury Plain. AIF Headquarters was established at Horseferry Road
Horseferry Road
Horseferry Road is a street in the City of Westminster in central London, England, running between Millbank and Greycoat Place. It is perhaps best known as the site of City of Westminster Magistrates' Court...
in London and Colonel R. M. McC. Anderson, a businessman, was appointed as its commandant. Anderson negotiated a new method of payment for services provided by the British Army as a per capita per diem payment.
Battle of the Somme, 1916
.jpg)
Battle of the Somme (1916)
The Battle of the Somme , also known as the Somme Offensive, took place during the First World War between 1 July and 14 November 1916 in the Somme department of France, on both banks of the river of the same name...
, nevertheless within three weeks of the beginning of the Allied offensive, four divisions of the AIF had been committed to the battle. Only the 3rd Division did not take part, having only just recently arrived in England from Australia. The 5th Division, positioned on the left flank of the salient, was the first to see action during the Battle of Fromelles
Battle of Fromelles
The Battle of Fromelles, sometimes known as the Action at Fromelles or the Battle of Fleurbaix , occurred in France between 19 July and 20 July 1916, during World War I...
on 19 July 1916, suffering a staggering 5,533 casualties in a single day.
The 1st Division entered the line on 23 July 1916, taking part in the assault on Pozieres
Battle of Pozières
The Battle of Pozières was a two week struggle for the French village of Pozières and the ridge on which it stands, during the middle stages of the 1916 Battle of the Somme. Though British divisions were involved in most phases of the fighting, Pozières is primarily remembered as an Australian battle...
. Initially they succeeded in carrying the German positions with relatively small losses, however, once the Germans had recovered they directed an intense artillery barrage upon the town which resulted in heavy losses. By the time that they were relieved by the 2nd Division on 27 July, they had suffered 5,286 casualties. Two days after taking over the line, the 2nd Division was thrown into a hastily-planned attack that resulted in further casualties when the Germans spotted the Australians forming up and once again subjected them to the weight of their artillery and machine guns. Another attack was launched on 4 August which, although it met with success, resulted again in such heavy casualties—almost 7,000—that the division was relieved the next day.
Following the attack on Pozieres the Australians were called upon to attack Mouquet Farm
Battle of Mouquet Farm
The Battle of Mouquet Farm, which began on 5 August 1916, was part of the Battle of the Somme and followed the Battle of Pozières. The farm was eventually captured on 26 September by No. 16 Section of the 6th East Yorkshire Pioneers.-Battle:...
in August. All three divisions of I Anzac Corps were committed in an effort to force a breach in the German lines behind Thiepval
Thiepval
The Thiepval Memorial to the Missing of the Somme is a major war memorial to 72,191 missing British and South African men who died in the Battles of the Somme of the First World War between 1915 and 1918 who have no known grave...
, to the north of Pozieres. The task of the initial advance fell to the 4th Division on 10 August, which had already suffered 1,000 casualties resisting the final German counter-attack, but in the ensuing battle it would lose a further three times that number as the Australians once again suffered at the hands of the German artillery, finding themselves squeezed into a frontage of less than 1.5 kilometre (0.93205910497471 mi) against which the Germans were able to concentrate the weight of their defence. Three more attacks were made over the course of the next three weeks as the Australians fought their way across the shell-pocked countryside to the farm, only to be forced out again shortly after by the concentration of German artillery. The other two divisions of I Anzac fared only slightly better in these attacks and at the end of the engagement, Australian casualties at Mouquet Farm totalled 6,300 men.
As that battle on the Somme dragged on, the Canadian Corps
Canadian Corps
The Canadian Corps was a World War I corps formed from the Canadian Expeditionary Force in September 1915 after the arrival of the 2nd Canadian Division in France. The corps was expanded by the addition of the 3rd Canadian Division in December 1915 and the 4th Canadian Division in August 1916...
was brought up and the AIF was withdrawn from the line to re-organise and reform, having suffered almost 23,000 casualties over the course of the 45 days that they had been involved. The 5th Division had been so badly mauled, having been incapacitated by the losses they had suffered at Fromelles, that it was not until October that the 5th Division finally returned to the line and joined the 1st, 2nd and 4th Divisions on the Somme near Flers
Flers, Somme
Flers is a commune near the northern edge of the Somme department in Picardie in northern France.It lies to the south of the D929 road, between Albert and Bapaume.-History:...
.
Battle of Bullecourt
In March 1917 two 'flying columns' from the 2nd and 5th Divisions pursued the German back to the Hindenburg LineHindenburg Line
The Hindenburg Line was a vast system of defences in northeastern France during World War I. It was constructed by the Germans during the winter of 1916–17. The line stretched from Lens to beyond Verdun...
, capturing the town of Bapaume
Bapaume
Bapaume is a commune and the seat of a canton in the Pas-de-Calais department in the Nord-Pas-de-Calais region of France.-Geography:A farming and light industrial town located 10 miles south of Arras at the junction of the A1 autoroute and the N17 and N30 national roads its location is...
. On 11 April the 4th Division, consisting of the 4th and 12th Brigades, assaulted the Hindenburg Line in the First Battle of Bullecourt. The battle was a disaster, with over 3,000 casualties and 1,170 taken prisoner by the Germans.
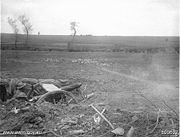
Arras
Arras is the capital of the Pas-de-Calais department in northern France. The historic centre of the Artois region, its local speech is characterized as a Picard dialect...
. The Australians were initially forced to abandon the town to the Germans and in the process several artillery batteries were lost, however, at 7:00 am a successful counter attack was launched by four Australian battalions, resulting in the town being recaptured and the guns reclaimed.
Later, on 3 May two brigades of the 2nd Division—the 5th and the 6th—took part in the Second Battle of Bullecourt, where they succeeded in taking sections of the Hindenburg Line and eventually managed to hold most these gains until they were relieved by the 1st Division. On 7 May the 5th Division was committed to relieve the 1st, remaining in the line until the battle ended in mid May. While the battle resulted in a victory for the Allies, the effort cost the AIF some 7,482 casualties and ultimately ended plans to expand the AIF to a sixth division.
Messines
On 7 June 1917, along with two British corps, the II Anzac Corps, consisting of the Australian 3rd Division, the British 25th Division and the New Zealand Division, with the Australian 4th Division attached, launched an operation in the Flanders region of southern Belgium, near Messines. The objective was to eliminate a salient that had developed in the line south of Ypres, enclosing the Wytschaete–Messines ridge and thus providing the Germans with good observation and fields of fire that could threaten the major offensive that the British planned to launch around Ypres later in the year.
Phosgene
Phosgene is the chemical compound with the formula COCl2. This colorless gas gained infamy as a chemical weapon during World War I. It is also a valued industrial reagent and building block in synthesis of pharmaceuticals and other organic compounds. In low concentrations, its odor resembles...
and shrapnel shells while moving towards the line of departure, nevertheless the division still managed to get into position for the start of the attack. Strong German counter attacks were launched the next day, once again supported by concentrated artillery fire, however, the advance was able to continue on through the mess of concrete blockhouses the Germans had erected and continued on until all the objectives had been taken.
Australian casualties amounted to nearly 6,800 men. On 2 July 1917, Major General Holmes was mortally wounded by a German shellburst while surveying the Messines battlefield with the Premier of New South Wales, William Holman
William Holman
William Arthur Holman was an Australian Labor Party Premier of New South Wales, Australia, who split with the party on the conscription issue in 1916 during World War I, and immediately became Premier of a conservative Nationalist Party Government.-Early life:Holman was born in St Pancras, London,...
.
Third Battle of Ypres
Between September and November 1917, I Anzac Corps took part in a number of actions around Ypres in Belgium as the Allies launched a campaign in order to capture the Gheluvelt Plateau in Belgium. Collectively these actions have come to be known as the Third Battle of Ypres, of which they were a part, although to Australians they are more commonly known by the names of the places where the individual actions took place—Menin Road, Polygon Wood, Broodseinde, Poelcappelle and Passchendaele..jpg)
The first two attacks had been successful and as Allied commanders began to believe that a breakthrough was possible further attacks were made at Poelcappelle on 9 October and at Passchendaele on 12 October despite heavy rain that turned the ground into a muddy quagmire. Both attacks were ultimately doomed to failure, with heavy casualties, as the attacks foundered in the mud and as the battle petered out, it was decided that it was time for the Australians to be withdrawn from the line. This was completed by 14 November 1917. Over the course of the eight weeks they had been involved in the fighting around Ypres, they had suffered 38,000 casualties.
German Spring Offensive, 1918
On 21 March 1918, having been buoyed by the capitulation of Tsarist Russia, the German Army launched their Spring OffensiveSpring Offensive
The 1918 Spring Offensive or Kaiserschlacht , also known as the Ludendorff Offensive, was a series of German attacks along the Western Front during World War I, beginning on 21 March 1918, which marked the deepest advances by either side since 1914...
against the Allies with a staggering 63 divisions over a front of 70 miles (112.7 km). As the Allies began to fall back against the tremendous weight of this offensive, on 25 March the Australian 3rd and 4th Divisions were rushed south to Amiens from where they had been holding the line at Messines.
The German offensive lasted with varying intensity for the next five months and during this time, all five divisions of the AIF in France were involved in the fighting as they attempted to stem the tide of the German advance, which achieved large territorial gains and at one stage looked like it might ultimately secure a remarkable victory for the Germans as they pushed to within 50 miles (80.5 km) from Paris late in May. During this time, the Australians were involved in a number of actions at Dernacourt, Morlancourt, Villers-Bretonneux, Hangard Wood, Hazebrouck, and Hamel.
Of these actions, the last one, at Hamel
Battle of Hamel
The Battle of Hamel was a successful attack launched by the Australian Corps of the Australian Imperial Force and several American units against German positions in and around the town of Hamel in northern France during World War I....
on 4 July 1918, is perhaps the most notable. Even though the action was relatively minor in terms of the scale of previous operations mounted on the Western Front, it is notable because it was the first 'set-piece' operation planned and carried out by the newly appointed commander of the Australian Corps, Lieutenant-General John Monash and it has since been used as the model of how to successfully carry out a combined arms attack.
Utilising aircraft, artillery and armour in effective combination with infantry, the attack was over in the space of 93 minutes; although Monash had planned for a 90 minute operation. It achieved its objectives of straightening the Allied line and taking the town of Hamel. The Australians had advanced the line almost 2 kilometres (1.2 mi) across a front of 6.5 kilometres (4 mi) and in the process taken roughly 1,600 German prisoners as well as over 200 machine guns, trench mortars and anti-tank weapons. Against this the Australians suffered 1,062 casualties.A further 142 casualties were suffered by the Australian 15th Brigade who launched a diversionary attack, while there were also 176 casualties amongst the 10 companies of Americans that were also involved in the operation.
Hundred Days Offensive
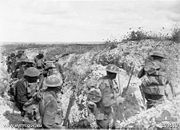
Peaceful Penetration
Peaceful Penetration was an Australian infantry tactic used during the First World War , which was a cross between trench raiding and patrolling...
s and were essentially a cross between trench raids
Trench raiding
Trench raiding was a feature of trench warfare which developed during World War I. It was the practice of making small scale surprise attacks on enemy position. Raids were made by both sides in the conflict and always took place at night for reasons of stealth...
and patrolling. Their success relied heavily upon the leadership and initiative of junior commanders and the ability of soldiers to employ principles of fire and manouevre. This lull did not last long, however, as the Allies were soon ready to launch their own offensive, known as the Hundred Days Offensive
Hundred Days Offensive
The Hundred Days Offensive was the final period of the First World War, during which the Allies launched a series of offensives against the Central Powers on the Western Front from 8 August to 11 November 1918, beginning with the Battle of Amiens. The offensive forced the German armies to retreat...
, which would ultimately bring about an end to the war.
The offensive began on 8 August 1918 when 20 Allied divisions, including four Australian, struck at Amiens on the Somme. Using the combined arms techniques developed earlier at Hamel, the Allies achieved territorial gains that had been unheard of since the start of the war. In the Australian sector, the 4th and 5th Divisions had initially spearheaded the advance, before the 2nd and 3rd Divisions had advanced another three kilometres to secure the secondary objectives. The attack had been so successful that it was later described by German General Erich Ludendorff
Erich Ludendorff
Erich Friedrich Wilhelm Ludendorff was a German general, victor of Liège and of the Battle of Tannenberg...
as a "black day" for the German Army.
Following that the Allied offensive continued for the next four months, right up until the end of the war. During the Second Battle of the Somme
Second Battle of the Somme (1918)
During the First World War, the Second Battle of the Somme of 1918 was fought on the Western Front from the end of the summer, in the basin of the Somme River...
the Australian Corps fought actions at Lihons, Etinehem, Proyart, Chuignes, and Mont St Quentin, before taking part in their final engagement of the war on 5 October 1918 at Montbrehain. Australian casualties during these battles were very high and coupled with the drying up of reinforcements from Australia, the rejection of the proposal to introduce conscription and the granting of home leave to men who been serving since 1914 meant that by the end of the war the AIF was severely stretched to the limit. Consequently during the height of the offensive it was decided to disband three battalions—the 36th, 47th
47th Battalion (Australia)
The 47th Battalion was an infantry battalion of the Australian Army. It was originally raised in 1916 for service during the First World War and took part in the fighting in the trenches of the Western Front in France and Belgium before being disbanded in early 1918 to provide reinforcements for...
and 52nd
52nd Battalion (Australia)
The 52nd Battalion was an infantry battalion of the Australian Army. It was originally raised in 1916 for service during the World War I and took part in the fighting in the trenches of the Western Front in France and Belgium and was disbanded in 1918...
—in order to reinforce other units. The engagement at Montbrehain was the Australian Corps' last contribution to the war and they were out of the line training when the Armistice
Armistice
An armistice is a situation in a war where the warring parties agree to stop fighting. It is not necessarily the end of a war, but may be just a cessation of hostilities while an attempt is made to negotiate a lasting peace...
was declared on 11 November 1918.
Other theatres
When the war ended, there were 92,000 Australian soldiers in France, 60,000 in England and 17,000 in Egypt, Palestine and Syria. Small numbers were serving in other theatres. Australian troops from the 1st Australian Wireless Signal Squadron1st Australian Wireless Signal Squadron
The 1st Australian Wireless Signal Squadron was a unit of the Australian Imperial Force which served in Mesopotamia during World War I. It took part in the Mesopotamian Campaign, providing communications to British forces. In total, 558 Australian signallers were sent to Mesopotamia, however only...
provided communications for British forces during the Mesopotamian Campaign
Mesopotamian Campaign
The Mesopotamian campaign was a campaign in the Middle Eastern theatre of World War I fought between the Allies represented by the British Empire, mostly troops from the Indian Empire, and the Central Powers, mostly of the Ottoman Empire.- Background :...
. They participated in a number of battles, including the Battle of Baghdad in March 1917 and the Battle of Ramadi in September that year.
Following the Russian Revolution in 1917, the Caucasus Front
Caucasus Campaign
The Caucasus Campaign comprised armed conflicts between the Ottoman Empire and the Russian Empire, later including Azerbaijan, Armenia, Central Caspian Dictatorship and the UK as part of the Middle Eastern theatre or alternatively named as part of the Caucasus Campaign during World War I...
collapsed, leaving Central Asia open to the Turkish
Ottoman Empire
The Ottoman EmpireIt was usually referred to as the "Ottoman Empire", the "Turkish Empire", the "Ottoman Caliphate" or more commonly "Turkey" by its contemporaries...
Army. A special force, known as Dunsterforce
Dunsterforce
Established in 1917, Dunsterforce was an Allied military mission of under 1,000 Australian, New Zealand, British, and Canadian troops , accompanied by armoured cars, deployed from Hamadan some 350 km across Qajar Persia. It was named after its commander General Lionel Dunsterville...
after its commander, Major General
Major-General (United Kingdom)
Major general is a senior rank in the British Army. Since 1996 the highest position within the Royal Marines is the Commandant General Royal Marines who holds the rank of major general...
Lionel Dunsterville, was formed from hand-picked British officers and NCOs to organise any remaining Russian forces or civilians who were ready to fight the Turkish forces
Ottoman Empire
The Ottoman EmpireIt was usually referred to as the "Ottoman Empire", the "Turkish Empire", the "Ottoman Caliphate" or more commonly "Turkey" by its contemporaries...
. Some 20 Australian officers served with Dunsterforce in the Caucasus Campaign
Caucasus Campaign
The Caucasus Campaign comprised armed conflicts between the Ottoman Empire and the Russian Empire, later including Azerbaijan, Armenia, Central Caspian Dictatorship and the UK as part of the Middle Eastern theatre or alternatively named as part of the Caucasus Campaign during World War I...
and one party under Captain Stanley Savige
Stanley Savige
Lieutenant General Sir Stanley George Savige, KBE, CB, DSO, MC, ED , was an Australian Army soldier and officer who served in World War I and World War II, rising to the rank of lieutenant general....
was instrumental in protecting thousands of Assyrian refugees.
Australian nurses staffed four British hospitals in Salonika
Macedonian front (World War I)
The Macedonian Front resulted from an attempt by the Allied Powers to aid Serbia, in the autumn of 1915, against the combined attack of Germany, Austria-Hungary and Bulgaria. The expedition came too late and in insufficient force to prevent the fall of Serbia, and was complicated by the internal...
. They also staffed another 10 in India
India
India , officially the Republic of India , is a country in South Asia. It is the seventh-largest country by geographical area, the second-most populous country with over 1.2 billion people, and the most populous democracy in the world...
.
Australian Flying Corps
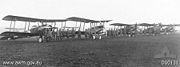
The Australian Flying Corps (AFC) was formed in March 1914 and it was soon deployed to German New Guinea
German New Guinea
German New Guinea was the first part of the German colonial empire. It was a protectorate from 1884 until 1914 when it fell to Australia following the outbreak of the First World War. It consisted of the northeastern part of New Guinea and several nearby island groups...
, with one BE2c aircraft and crew dispatched with the AN&MEF, although the colonies surrendered before the plane was even unpacked. The first operational flights did not occur until 27 May 1915, when the Mesopotamian Half Flight
Mesopotamian Half Flight
The Mesopotamian Half-Flight, or Australian Half-Flight was the first Australian Flying Corps unit to see active service.At the start of World War I, the air forces of the Allied forces were small and primitive. Most of the available aircraft and pilots were assigned to the Western Front...
was called upon to assist the Indian Army
British Indian Army
The British Indian Army, officially simply the Indian Army, was the principal army of the British Raj in India before the partition of India in 1947...
in protecting British oil interests in what is now Iraq
Iraq
Iraq ; officially the Republic of Iraq is a country in Western Asia spanning most of the northwestern end of the Zagros mountain range, the eastern part of the Syrian Desert and the northern part of the Arabian Desert....
. The Corps later saw action in Egypt
Egypt
Egypt , officially the Arab Republic of Egypt, Arabic: , is a country mainly in North Africa, with the Sinai Peninsula forming a land bridge in Southwest Asia. Egypt is thus a transcontinental country, and a major power in Africa, the Mediterranean Basin, the Middle East and the Muslim world...
, Palestine
Palestine
Palestine is a conventional name, among others, used to describe the geographic region between the Mediterranean Sea and the Jordan River, and various adjoining lands....
and on the Western Front
Western Front (World War I)
Following the outbreak of World War I in 1914, the German Army opened the Western Front by first invading Luxembourg and Belgium, then gaining military control of important industrial regions in France. The tide of the advance was dramatically turned with the Battle of the Marne...
throughout the remainder of the war. Organised into four operational squadrons in France and the Middle East and another four training squadrons in England, the AFC remained part of the AIF. Despite Australian military aviation being in its infancy, the AFC's identity as a separate national force was considered important, not to mention unusual. Thousands of aircrew from the other Dominions—such as New Zealand and Canada—flew with the Royal Flying Corps
Royal Flying Corps
The Royal Flying Corps was the over-land air arm of the British military during most of the First World War. During the early part of the war, the RFC's responsibilities were centred on support of the British Army, via artillery co-operation and photographic reconnaissance...
, Royal Naval Air Service
Royal Naval Air Service
The Royal Naval Air Service or RNAS was the air arm of the Royal Navy until near the end of the First World War, when it merged with the British Army's Royal Flying Corps to form a new service , the Royal Air Force...
and the Royal Air Force
Royal Air Force
The Royal Air Force is the aerial warfare service branch of the British Armed Forces. Formed on 1 April 1918, it is the oldest independent air force in the world...
during the war without gaining the benefits of command and the administrative experience which came with an independent air service. By the end of the war, four squadrons had seen active service, 460 officers and 2,234 other ranks had served in the AFC, and another 200 men had served as aircrew in the British flying services. Casualties included 175 dead, 111 wounded, 6 gassed and 40 captured. The AFC was subsequently disbanded after the war in 1919 being replaced by the Australian Air Corps, which became the Royal Australian Air Force
Royal Australian Air Force
The Royal Australian Air Force is the air force branch of the Australian Defence Force. The RAAF was formed in March 1921. It continues the traditions of the Australian Flying Corps , which was formed on 22 October 1912. The RAAF has taken part in many of the 20th century's major conflicts...
in 1921.
Mesopotamian Half Flight
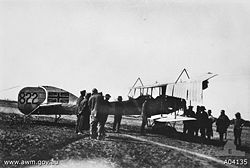
The Mesopotamian Half-Flight—also known as the Australian Half-Flight—was the first AFC unit to see active service. On 8 February 1915, the Australian Government had received a request for air assistance from the Viceroy of India for assistance fighting the Turks. The AFC was still forming and could provide enough aircrew and ground staff for only half a flight: the unit therefore became known as the Mesopotamian Half-Flight and Captain Henry Petre
Henry Petre
Henry Aloysius Petre DSO, MC was an English solicitor who became Australia's first military aviator, and a founding member of the Australian Flying Corps, predecessor of the Royal Australian Air Force...
was appointed commander. The AFC contingent sailed for Bombay, and on 20 April 1915 it left for Basra
Basra
Basra is the capital of Basra Governorate, in southern Iraq near Kuwait and Iran. It had an estimated population of two million as of 2009...
, arriving at the end of May. Flying underpowered and unreliable aircraft such as the Caudron
Caudron
The Caudron Airplane Company was a French aircraft company founded in 1909 by brothers Gaston Caudron and René Caudron . It was one of the earliest aircraft manufacturers in France and produced planes for the military in both World War I and World War II...
, Maurice Farman Longhorn and Martinsyde
Martinsyde
Martinsyde was a British aircraft and motorcycle manufacturer between 1908 and 1922, when they were forced into liquidation by a factory fire.-History:...
, the Half-Flight suffered a high attrition rate, losing two killed and six captured out of its strength of just nine pilots. The arrival of reinforcements allowed the formation of a squadron, (No. 30 Squadron RFC
No. 30 Squadron RAF
No. 30 Squadron of the Royal Air Force operates the second generation C-130J Hercules from RAF Brize Norton, Oxfordshire. The squadron operates alongside No. 24 Squadron and No. 47 Squadron all flying the Hercules.-History:...
), however by November 1915 only one of the original pilots remained. The squadron was mainly involved in unarmed reconnaissance, although later small 9 pounds (4.1 kg) bombs were added to the aircraft. In October, three Australian aircraft bombed an Arab tribe known to be hostile in an unsuccessful attempt to bring them to surrender. During the Siege of Kut
Siege of Kut
The siege of Kut Al Amara , was the besieging of 8,000 strong British-Indian garrison in the town of Kut, 100 miles south of Baghdad, by the Ottoman Army. Its known also as 1st Battle of Kut. In 1915, its population was around 6,500...
the last Australian pilot in Mesopotamia
Mesopotamia
Mesopotamia is a toponym for the area of the Tigris–Euphrates river system, largely corresponding to modern-day Iraq, northeastern Syria, southeastern Turkey and southwestern Iran.Widely considered to be the cradle of civilization, Bronze Age Mesopotamia included Sumer and the...
, Captain Petre, dropped supplies to the garrison. When Kut surrendered, the AFC ground crewmen located in the city were captured, seven of them later dying in captivity. Petre flew the only remaining Shorthorn
Shorthorn
The Shorthorn breed of cattle originated in the North East of England in the late 18th century. The breed was developed as dual purpose, suitable for both dairy and beef production; however there were always certain blood lines within the breed which emphasised one quality or the other...
to Egypt
Egypt
Egypt , officially the Arab Republic of Egypt, Arabic: , is a country mainly in North Africa, with the Sinai Peninsula forming a land bridge in Southwest Asia. Egypt is thus a transcontinental country, and a major power in Africa, the Mediterranean Basin, the Middle East and the Muslim world...
on 7 December 1915, where he rendezvoused with No.1 Squadron AFC
No. 1 Squadron RAAF
No. 1 Squadron is a Royal Australian Air Force squadron based at RAAF Amberley. The squadron is currently being re-equipped with F/A-18F Super Hornet multi-role fighters.-World War I:...
, effectively marking the end of the Half-Flight's service.
AFC in the Middle East
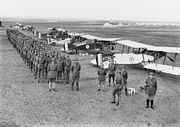
Egypt
Egypt , officially the Arab Republic of Egypt, Arabic: , is a country mainly in North Africa, with the Sinai Peninsula forming a land bridge in Southwest Asia. Egypt is thus a transcontinental country, and a major power in Africa, the Mediterranean Basin, the Middle East and the Muslim world...
with 28 officers and 195 other ranks, where they were equipped with British aircraft including BE2c and Martinsyde G100
Martinsyde G.100
-See also:-References:* Aircraft of World War I, Kenneth Munson, 1967 Ian Allan ISBN 0-7110-0356-4-External links:* http://www.theaerodrome.com/aircraft/gbritain/martinsyde_g100.php* http://www.britishaircraft.co.uk/aircraftpage.php?ID=721...
. The squadron operated from Heliopolis
Heliopolis (Cairo Suburb)
Modern Heliopolis is a district in Cairo, Egypt. The city was established in 1905 by the Heliopolis Oasis Company, headed by the Belgian industrialist Édouard Louis Joseph, Baron Empain, as well as Boghos Nubar, son of the Egyptian Prime Minister Nubar Pasha.-History:The Baron Empain, a well known...
, Palestine
Palestine
Palestine is a conventional name, among others, used to describe the geographic region between the Mediterranean Sea and the Jordan River, and various adjoining lands....
and Syria
Syria
Syria , officially the Syrian Arab Republic , is a country in Western Asia, bordering Lebanon and the Mediterranean Sea to the West, Turkey to the north, Iraq to the east, Jordan to the south, and Israel to the southwest....
over the next two years, supporting ground forces in all the major battles of the Palestine campaign against the Turks. Missions included aerial reconnaissance, bombing enemy positions, communications and artillery spotting. They were also involved in many air-to-air battles with German aircraft, while it was in this theatre that the Australians first encountered anti-aircraft fire. The squadron was re-equipped in 1917 with BE2a, RE8
Royal Aircraft Factory R.E.8
The Royal Aircraft Factory R.E.8 was a British two-seat biplane reconnaissance and bomber aircraft of the First World War designed by John Kenworthy. Intended as a replacement for the vulnerable B.E.2, the R.E.8 was more difficult to fly, and was regarded with great suspicion at first in the Royal...
and Martinsyde G102
Martinsyde G.100
-See also:-References:* Aircraft of World War I, Kenneth Munson, 1967 Ian Allan ISBN 0-7110-0356-4-External links:* http://www.theaerodrome.com/aircraft/gbritain/martinsyde_g100.php* http://www.britishaircraft.co.uk/aircraftpage.php?ID=721...
aircraft, while by 1918 these types were replaced with Bristol F.2 Fighter
Bristol F.2 Fighter
The Bristol F.2 Fighter was a British two-seat biplane fighter and reconnaissance aircraft of the First World War flown by the Royal Flying Corps. It is often simply called the Bristol Fighter or popularly the "Brisfit" or "Biff". Despite being a two-seater, the F.2B proved to be an agile aircraft...
s. Notably during this time Lieutenant
Lieutenant
A lieutenant is a junior commissioned officer in many nations' armed forces. Typically, the rank of lieutenant in naval usage, while still a junior officer rank, is senior to the army rank...
Frank McNamara
Frank Hubert McNamara
Air Vice Marshal Francis Hubert McNamara VC, CB, CBE was an Australian recipient of the Victoria Cross, the highest decoration for valour in the face of the enemy that can be awarded to a member of the British and Commonwealth forces...
was awarded the Victoria Cross
Victoria Cross
The Victoria Cross is the highest military decoration awarded for valour "in the face of the enemy" to members of the armed forces of various Commonwealth countries, and previous British Empire territories....
for rescuing another Australian pilot who had been shot down by ground fire and forced to land close to Turkish positions on 20 March 1917. No. 1 Squadron also took part in the actions at Wadi Fara on 21 September 1918 as part of the Battle of Megiddo
Battle of Megiddo (1918)
The Battle of Megiddo took place between 19 September and 1 October 1918, in what was then the northern part of Ottoman Palestine and parts of present-day Syria and Jordan...
, which witnessed the destruction of the bulk of the Turkish Seventh Army by British airpower.The battle is cited as an early example of the destructive potential of airpower and involved seven British squadrons (including No.1 Squadron AFC). The Turkish Seventh Army was caught in Wadi Fara and was unable to escape due to the steep hills and cliffs which forced them to use the road. The attack began at 6:30 am and continued non-stop until 12:00, with No. 1 Squadron alone dropping three tonnes of bombs and expending nearly 24,000 rounds. When British ground forces reached the area the following day they found 87 artillery pieces and nearly 1,000 vehicles abandoned or destroyed. Casualties among the estimated 7,000 Turkish troops caught in the attacks were not established but were believed to have been high.
AFC on the Western Front
Additional AFC squadrons began forming in Australia for service on the Western Front, with No. 2No. 2 Squadron RAAF
No. 2 Squadron is a Royal Australian Air Force squadron. From its formation in 1916, it has operated a variety of aircraft types including fighters, bombers, and Airborne Early Warning & Control.-World War I:No...
, 3
No. 3 Squadron RAAF
No. 3 Squadron is a Royal Australian Air Force fighter squadron. It was first formed in 1916 and currently operates F/A-18 Hornet aircraft from RAAF Base Williamtown, near Newcastle, New South Wales.-World War I:...
and 4 Squadrons
No. 4 Squadron RAAF
No. 4 Squadron is a Royal Australian Air Force squadron responsible for training forward air controllers. The squadron was previously a fighter and army co-operation unit active in both World War I and World War II.-World War I:...
arriving in France between August and December 1917. No. 2 Squadron, equipped with DH5s, was subsequently involved in the Battle of Cambrai on 20 November 1917, conducting patrol duties, ground strafing and bombing enemy troops and positions. Casualties were high with 7 of the squadrons 18 aircraft shot down, and 2 pilots lost. No. 3 Squadron, equipped with RE8s, was supporting the final phase of the Battle of Passchendaele in Flanders, conducting mainly artillery spotting duties. No. 4 Squadron, equipped with Sopwith Camels, was the last to arrive in France, and was assigned to the First Army around Lens. Notably during March 1918 the squadron was engaged in aerial combat with aircraft commanded by Manfred von Richtofen—known as the 'Red Baron'—shooting down two German aircraft for the loss of one of their own. The Lens sector had been relatively quiet until 21 March 1918 when the Germans launched a major offensive, with No. 4 Squadron heavily engaged in low-level bombing to support the 4th Australian Division.
The Australian squadrons played a limited role in the allied advance from Amiens
Amiens
Amiens is a city and commune in northern France, north of Paris and south-west of Lille. It is the capital of the Somme department in Picardy...
on 8 August 1918, with No. 3 Squadron engaged in reconnaissance and contact patrols to help identify the locations of forward troops. They also undertook extensive aerial photography to aid in remapping and the locating of German artillery positions. During this period Nos. 2 and 4 Squadrons were in the Ypres
Ypres
Ypres is a Belgian municipality located in the Flemish province of West Flanders. The municipality comprises the city of Ypres and the villages of Boezinge, Brielen, Dikkebus, Elverdinge, Hollebeke, Sint-Jan, Vlamertinge, Voormezele, Zillebeke, and Zuidschote...
–Arras
Arras
Arras is the capital of the Pas-de-Calais department in northern France. The historic centre of the Artois region, its local speech is characterized as a Picard dialect...
area and were involved in patrols and raids on the railways in the vicinity of Lille
Lille
Lille is a city in northern France . It is the principal city of the Lille Métropole, the fourth-largest metropolitan area in the country behind those of Paris, Lyon and Marseille. Lille is situated on the Deûle River, near France's border with Belgium...
. With the Germans in retreat during September 1918 the squadrons felt considerable pressure just keeping up. Regardless, No. 4 Squadron took part in, perhaps its most spectacular action, in the very last weeks of the war. On 29 October, 15 Australian Sopwith Snipe
Sopwith Snipe
The Sopwith 7F.1 Snipe was a British single-seat biplane fighter of the Royal Air Force . It was designed and built by the Sopwith Aviation Company during the First World War, and came into squadron service a few weeks before the end of that conflict, in late 1918.The Snipe was not a fast aircraft...
s encountered more than 60 German Fokkers, in an action which became one of the largest air battles of the war. The Australians gained the upper hand and 10 Fokkers were shot down for the loss of one Snipe, and the damage of several others.
During their time on the Western Front No. 2 and No 4. Squadrons had been used mainly in the fighter role, while No. 3 Squadron was primarily used for reconnaissance. No. 4 Squadron became the most successful fighter squadron in France, accounting for 199 enemy aircraft, while No. 2 Squadron was credited with the destruction of 185. The total AFC casualties on the Western Front included 78 killed, 68 wounded and 33 taken prisoner.
Following the end of the war on 11 November 1918 No. 4 Squadron was the only Australian unit assigned to the British Army of Occupation, arriving in Germany in December and being based in Cologne
Cologne
Cologne is Germany's fourth-largest city , and is the largest city both in the Germany Federal State of North Rhine-Westphalia and within the Rhine-Ruhr Metropolitan Area, one of the major European metropolitan areas with more than ten million inhabitants.Cologne is located on both sides of the...
. The three AFC squadrons subsequently handed over their equipment to the RAF in February 1919 and returned to Australia where they disbanded.
Royal Australian Navy operations
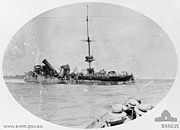
At the outbreak of war the Royal Australian Navy consisted of the battlecruiser
Battlecruiser
Battlecruisers were large capital ships built in the first half of the 20th century. They were developed in the first decade of the century as the successor to the armoured cruiser, but their evolution was more closely linked to that of the dreadnought battleship...
, the light cruiser
Light cruiser
A light cruiser is a type of small- or medium-sized warship. The term is a shortening of the phrase "light armored cruiser", describing a small ship that carried armor in the same way as an armored cruiser: a protective belt and deck...
s , and (under construction), the destroyer
Destroyer
In naval terminology, a destroyer is a fast and maneuverable yet long-endurance warship intended to escort larger vessels in a fleet, convoy or battle group and defend them against smaller, powerful, short-range attackers. Destroyers, originally called torpedo-boat destroyers in 1892, evolved from...
s , and , and the submarine
Submarine
A submarine is a watercraft capable of independent operation below the surface of the water. It differs from a submersible, which has more limited underwater capability...
s and . Three more destroyers were also under construction. The Squadron was under the command of Rear Admiral Sir George E. Patey
George Edwin Patey
Admiral Sir George Edwin Patey KCMG, KCVO was a senior officer in the Royal Navy.-Biography:Patey was born on 24 February 1859 at Montpellier, near Plymouth, United Kingdom. His father, also named George Edwin Patey, was a Royal Navy officer too...
, a British admiral who was knighted on the deck of the Australia before it departed England in 1913.
The first naval operation of the war was in support of the Australian Naval and Military Expeditionary Force
Australian Naval and Military Expeditionary Force
The Australian Naval and Military Expeditionary Force was a small volunteer force of approximately 2,000 men, raised in Australia shortly after the outbreak of the First World War to seize and destroy German wireless stations in German New Guinea in the south-west Pacific...
during the occupation of German New Guinea
German New Guinea
German New Guinea was the first part of the German colonial empire. It was a protectorate from 1884 until 1914 when it fell to Australia following the outbreak of the First World War. It consisted of the northeastern part of New Guinea and several nearby island groups...
. The naval portion of the force included the Australia, Melbourne, Sydney, , , and submarine AE1. The only loss during the New Guinea Campaign was when the AE1 disappeared on 14 September 1914, taking three officers and 32 men with it.
The first major RAN victory of the war occurred when the cruiser, HMAS Sydney sank the German light cruiser, off the Cocos Islands
Battle of Cocos
The Battle of Cocos took place on 9 November 1914 during the First World War off the Cocos Islands, in the north east Indian Ocean. The German light cruiser attacked the British cable station on Direction Island and was engaged several hours later by the Australian light cruiser...
in the Indian Ocean
Indian Ocean
The Indian Ocean is the third largest of the world's oceanic divisions, covering approximately 20% of the water on the Earth's surface. It is bounded on the north by the Indian Subcontinent and Arabian Peninsula ; on the west by eastern Africa; on the east by Indochina, the Sunda Islands, and...
on 9 November 1914. Four Australians were killed in the engagement and another 12 were wounded. Ships of the RAN helped provide naval cover for the ambitious landings at Gallipoli
Gallipoli
The Gallipoli peninsula is located in Turkish Thrace , the European part of Turkey, with the Aegean Sea to the west and the Dardanelles straits to the east. Gallipoli derives its name from the Greek "Καλλίπολις" , meaning "Beautiful City"...
, and the submarine AE2 broke the blockade of the Dardanelles
Dardanelles
The Dardanelles , formerly known as the Hellespont, is a narrow strait in northwestern Turkey connecting the Aegean Sea to the Sea of Marmara. It is one of the Turkish Straits, along with its counterpart the Bosphorus. It is located at approximately...
to harass Turkish
Turkey
Turkey , known officially as the Republic of Turkey , is a Eurasian country located in Western Asia and in East Thrace in Southeastern Europe...
shipping but was later sunk and her crew captured in the Sea of Marmara.

North Sea
In the southwest, beyond the Straits of Dover, the North Sea becomes the English Channel connecting to the Atlantic Ocean. In the east, it connects to the Baltic Sea via the Skagerrak and Kattegat, narrow straits that separate Denmark from Norway and Sweden respectively...
where they joined Australia, which had been assisting the Royal Navy
Royal Navy
The Royal Navy is the naval warfare service branch of the British Armed Forces. Founded in the 16th century, it is the oldest service branch and is known as the Senior Service...
in its blockade of the German High Seas Fleet
High Seas Fleet
The High Seas Fleet was the battle fleet of the German Empire and saw action during World War I. The formation was created in February 1907, when the Home Fleet was renamed as the High Seas Fleet. Admiral Alfred von Tirpitz was the architect of the fleet; he envisioned a force powerful enough to...
.
During this time the RAN also continued to carry out operations in the Pacific and Indian Oceans. By 1915 there were up to 74 German ships which had taken refuge in ports in the Netherlands East Indies. The presence of these ships close to Australia and the sea lanes that connected the nation to the United Kingdom and the Middle East was a cause of concern to the Navy and so in the middle of 1915 the cruiser Psyche
HMAS Psyche
HMAS Psyche was a Pelorus class light cruiser built for the Royal Navy at the end of the 19th century. She was transferred to the fledgling Royal Australian Navy in 1912.-Design and construction:...
and the sloop Fantome were sent to the Bay of Bengal
Bay of Bengal
The Bay of Bengal , the largest bay in the world, forms the northeastern part of the Indian Ocean. It resembles a triangle in shape, and is bordered mostly by the Eastern Coast of India, southern coast of Bangladesh and Sri Lanka to the west and Burma and the Andaman and Nicobar Islands to the...
to conduct patrol operations. Later in the year, in October, a force of three destroyers, a yacht and the cruiser Encounter were sent into the Macassar Strait to search for a German munitions base that had been reported in the area. Nothing was found, although the patrol served to interrupt German efforts to carry out subversive activities in a number of British possessions.
In May 1917 the British government requested assistance from the Australian government in dealing with the increasing threat posed by German U-boat
U-boat
U-boat is the anglicized version of the German word U-Boot , itself an abbreviation of Unterseeboot , and refers to military submarines operated by Germany, particularly in World War I and World War II...
s. Six destroyers—the Warrego, Parramatta, Yarra, Swan, Torrens and Huon—were sent in response to this request, and undertook anti-submarine operations in the Adriatic, working out of Brindisi, Italy as part of the Otranto Barrage
Otranto Barrage
The Otranto Barrage was an Allied naval blockade of the Otranto Straits between Brindisi in Italy and Corfu on the Albanian side of the Adriatic Sea in World War I. The blockade was intended to prevent the Austro-Hungarian Navy from escaping into the Mediterranean and threatening Allied operations...
.
The most decorated RAN unit of the war was the Bridging Train
Royal Australian Navy Bridging Train
The Royal Australian Navy Bridging Train was an Australian military unit active during World War I, composed of Royal Australian Naval Reservists who served in the Gallipoli Campaign. Despite often serving in close proximity with ANZAC Forces, the RANBT seldom operated in conjunction with them,...
. A reserve unit commanded by Lieutenant Commander
Lieutenant Commander
Lieutenant Commander is a commissioned officer rank in many navies. The rank is superior to a lieutenant and subordinate to a commander...
Leighton Bracegirdle
Leighton Seymour Bracegirdle
Rear Admiral Sir Leighton Seymour Bracegirdle KCVO, CMG, DSO was an Australian military commander and an Official Secretary to four Australian governors-general: Sir Isaac Isaacs, Lord Gowrie, the Duke of Gloucester, and William McKell.-Early life:He was born in Balmain, Sydney, on 31 May 1881. In...
, it supported the British at Suvla Bay during the Gallipoli Campaign by constructing piers and harbours in the bay. Afterwards it served in Egypt and Palestine, taking part in an amphibious assault in El Arish
Battle of Magdhaba
The Battle of Magdhaba took place on 23 December 1916 south and east of Bir Lahfan in the Sinai desert, some inland from the Mediterranean coast and the town of El Arish...
and the First Battle of Gaza
First Battle of Gaza
The First Battle of Gaza was fought in and around the town of Gaza on the Mediterranean coast in the southern region of Ottoman Palestine on 26 March 1917, during World War I...
before it was disbanded in 1917. A number of members later went on to serve with the AIF and RAN. During the war the RAN lost 171 men killed, including 15 officers and 156 sailors, of which six officers and 57 sailors had been on loan from the Royal Navy.
Australian Military Forces on home service
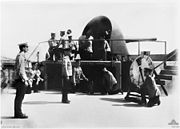
In the early stages of mobilisation a number of militia infantry battalions were called out to carry out guard duties upon infrastructure that was considered important to the war effort, such as munitions factories, communications facilities, ammunition dumps and transportation centres. 500 men from the Kennedy Regiment were sent to Thursday Island from Townsville to garrison the island in response to a possible threat from German forces in the Pacific. Additionally, militia troops were used to establish and guard internment camps and garrison artillery and engineer units from the militia were also mobilised to assist the Regular units that were manning coastal defences.
By the end of 1914 the naval situation in the Pacific had eased to a large extent due to the sinking of the Emden and it was decided that there was no longer a need to maintain guards on many of the less important facilities and instead it was decided to concentrate the home defence network upon maintaining the coastal defences and on guarding ships while they were in port. Nevertheless in the larger seaports these precautions required the commitment of considerable resources, requiring several hundred men to provide security. The requirement for the militia to undertake these duties was eased, however, when a special corps was raised from men that had been rejected for service with the AIF, to which a corps of garrison military police that had served in the AIF was added later.
The militia garrison artillery and engineers were required throughout the war, however, to man the coastal defences. Despite the fact that after 1915 it was decided that only small garrisons were required on active service, the militia was ordered to maintain their readiness in case they were required to be called out and such was the importance placed upon their role that to a large extent they were barred from joining the AIF for overseas service. In February 1916 a large scale effort by militia artillerymen to enlist in the artillery units that were being raised for the 3rd Division was prevented when they were called out to man the coastal defences due to the threat posed by a German commerce raider that was believed to be in the Pacific. This mobilisation lasted until April 1916 when the garrisons were again reduced and the ban on men serving in militia artillery and engineer units volunteering for overseas service was lifted.
In April 1918 the militia artillery was again mobilised, although this time only for a month, when news that the German commerce raiders Wolf
SMS Wolf (auxiliary cruiser)
SMS Wolf was an armed merchant raider or auxiliary cruiser of the German Imperial Navy in World War I...
and Seeadler
SMS Seeadler
SMS Seeadler was a German cruiser, part of a new breed of warships created by the new Imperial Navy. To protect the Empire's growing overseas possessions and colonies, the navy needed ships seaworthy enough to venture out into far off oceans and have the coal supply to reach far off destinations...
had entered Australian waters the previous year. In June 1918 the number of troops actively employed on home service was 9,215, of which 2,476 were Regulars. At this time the Navy took over the task of providing guards for ships in harbour and communications facilities, thus allowing for many of the militia troops to be released for further training and as such it was decided to increase the period of camp training for the militia from eight days to 24.
Conscription
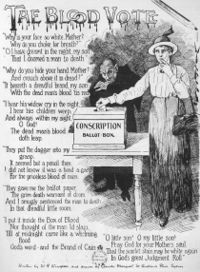
In Australia, however, public opinion about the matter was divided with many Australians opposed to the issue on moral grounds, feeling that the situation was not desperate enough to require such a drastic measure, while others felt it necessary in order to achieve final victory. The Hughes
Billy Hughes
William Morris "Billy" Hughes, CH, KC, MHR , Australian politician, was the seventh Prime Minister of Australia from 1915 to 1923....
Labor government decided to hold a referendum
Referendum
A referendum is a direct vote in which an entire electorate is asked to either accept or reject a particular proposal. This may result in the adoption of a new constitution, a constitutional amendment, a law, the recall of an elected official or simply a specific government policy. It is a form of...
on the matter and on 28 October 1916 the matter was decided by a narrow margin of 51% to 49%, with the no vote prevailing. Despite the result, the issue split the Labor Party and the pro-conscription prime minister, Billy Hughes, ultimately left the party and joined with members of the opposition that supported conscription to form a new party, known as the Nationalist Party
Nationalist Party of Australia
The Nationalist Party of Australia was an Australian political party. It was formed on 17 February 1917 from a merger between the conservative Commonwealth Liberal Party and the National Labor Party, the name given to the pro-conscription defectors from the Australian Labor Party led by Prime...
.
As manpower shortages on the Western Front began to become acute, a second plebiscite was held on 20 December 1917. This time it was defeated by an even greater margin of 94,152 votes. This effectively put an end to plans to expand the AIF in France and ultimately led to severe manpower shortages that the AIF in France experienced in 1917 and 1918. As a result plans to expand the force to a 6th Division were shelved and its manpower distributed amongst the other five divisions, while the five divisions were amalgamated together under the banner of the Australian Corps, thus effectively allowing the 4th Division, which was struggling to maintain its numbers to act as a depot formation within the Corps with the other three divisions providing most of the combat power. As the war continued, the manpower shortages continued and in October 1918 a number of battalions were disbanded in order to reinforce others, although this ultimately proved unnecessary as the war ended shortly after.
Internment, censorship and other special measures
The global nature of the war meant that many functions that were previously vested in the individual Australian state governments had to be placed under the control of the Commonwealth government. Additionally the exigencies of the war meant that the government required the power to enact certain laws that under the Constitution it would not normally be able to do. In order to enable this to occur, the War Precautions Act 1914War Precautions Act 1914
The War Precautions Act 1914 was an Act of the Parliament of Australia which gave the Government of Australia special powers for the duration of World War I and for six months afterwards.-Provisions:...
was introduced in October 1914, providing the Commonwealth government with wide ranging powers for a period of up to six months after the duration of the war.
The main provisions of the Act were focused upon allowing the Commonwealth to enact legislation that was required for the smooth prosecution of the war. The main areas in which legislation was enacted under the War Precautions Act were: the prevention of trade with hostile nations, the creation of loans to raise money for the war effort, the introduction of a national taxation scheme, the fixing of the prices of certain goods, the internment of people considered a danger to the war effort, the compulsory purchase of strategic goods, and the censorship of the media.
At the outbreak of the war there were about 35,000 people who had been born in either Germany or Austria-Hungary living in Australia. Due to large scale German migration in the late 19th century, there were also an inestimable number of people of German origin, many of whom maintained an affinity for their ancestral roots. Many of these were naturalised Australians and indeed it is believed that many men of German origin enlisted in the AIF, however, due to concerns about the loyalties of some members of the German and Austrian communities internment camps were set up where those suspected of unpatriotic acts were sent. In total it is believed that 4,500 people were interned under the provisions of the War Precautions Act, of which 700 were naturalised Australians and 70 Australian born. Following the end of the war, 6,150 were deported.
There was a considerable public backlash to the way in which some of the provisions of the War Precautions Act were applied, particularly in relation to certain sections of the community such as trade unions and other sections of the community that were for various reasons not as sympathetic to the British cause as the wider community. Indeed, in 1917, following the suppression of a prominent trade union and the jailing of 12 of its members on charges of sedition
Sedition
In law, sedition is overt conduct, such as speech and organization, that is deemed by the legal authority to tend toward insurrection against the established order. Sedition often includes subversion of a constitution and incitement of discontent to lawful authority. Sedition may include any...
and sabotage, it seemed as if Australia's war effort might have been in danger of breaking down.
After the war, the continued operation of the War Precautions Act led to considerable social and political unrest in late 1918 and into 1919 and a number of violent incidents broke out. The most notable of these was the so called Red Flag Riots
Red Flag Riots
The Red Flag Riots were a series of violent demonstrations and attacks that occurred in Queensland, Australia over the course of 1918–19. The attacks were largely undertaken by returned soldiers from the First Australian Imperial Force and were focused upon socialists and other elements of society...
in Brisbane, in 1919.
Economy
At the outset of the war, Australia's economy had been quite small and dependent largely upon agriculture and the resources industries for export earnings, while most manufactured products were imported from overseas. Almost immediately uncertainty over the continuation of foreign trade led to a rise in unemployment, indeed it was estimated that after only a couple of days of Britain having declared war, that up to 15,000 men had been retrenched in New South Wales alone due to concerns about the continued availability of foreign markets for Australian produce.These initial concerns, however, were short lived, at least in the beginning as the British government provided assurances that it would underwrite a large amount of the war risk insurance for shipping in order to allow trade amongst the Commonwealth to continue. Shortly thereafter the wartime direction of trade began when the British asked the Australian government to place certain restrictions upon overseas trade in order to secure resources vital to the war effort and to limit the ability of the Central Powers from obtaining these goods from Commonwealth nations via neutral third parties. To an extent these restrictions served to reduce the ability of Australian producers to find buyers for their products, at least initially, however, in many cases the British stepped in to buy these goods, thus alleviating Australian concerns about a significant reduction in the standard of living. This understanding proved particularly beneficial for the wool and wheat industries, where the British government undertook to buy Australian products even though the shortage of shipping meant that there was no chance that they would ever receive them.
On the whole Australian commerce was expanded due to the war, although the cost of the war was quite considerable and the Australian government had to borrow considerably from overseas to fund the war effort. In terms of value, Australian exports rose almost 45 per cent, while the number of Australians employed in the manufacturing industry increased over 11 per cent. This was due in the most part to the reduced ability of traditional sources to continue supplying Australia with manufactured products, which out of necessity stimulated the development of the Australian manufacturing industry.
In terms of goods produced indigenously, it was estimated that due to the inability of traditional suppliers to deliver manufactured goods because of trade embargoes and shipping shortages up to 400 new articles were produced in Australian factories as a result of the war. This was not an insignificant number, although the transformation of the Australian economy as a result of World War I was by no means as significant as that which occurred during World War II
World War II
World War II, or the Second World War , was a global conflict lasting from 1939 to 1945, involving most of the world's nations—including all of the great powers—eventually forming two opposing military alliances: the Allies and the Axis...
. Certainly the expansion of the steel industry that occurred during this time laid the foundation for future industrialisation.
Despite this increase in the domestic manufacturing industry there was still a significant shortfall in many items. In part this was due to the priority that military consumption and production necessarily had over civilian, however, there was also a considerable scarcity of raw materials and other components required for manufacturing. This was due both to the lack of shipping available from the United Kingdom, as well as the limitations placed upon the flow of such goods from Britain due to their own increased requirements. The result of this was inflationary. Domestic prices went up, while the cost of exports was deliberately kept lower than market value in an effort to prevent further inflationary pressures worldwide. As a result the cost of living for many average Australians was increased considerably.
An increase in the trade union movement was an inevitable corollary of this and during the war years there was a considerable increase in the membership of the various unions.Between 1914 and 1919 the number of Australian workers who were members of various trade unions rose by 104,314. Despite the considerable rises in the costs of many basic items, the government sought to maintain wages largely as they were. Although the average weekly wage during the war was increased by between 8–12 per cent, it was not enough to keep up with inflation and as a result there was considerable discontent amongst workers, to the extent that industrial action followed. Not all of these disputes were due to economic factors, and indeed in some part they were the result of violent opposition to the issue of conscription, which many trade unionists were opposed to. Nevertheless the result was very disruptive and it has been estimated that between 1914 and 1918 there were 1,945 industrial disputes, resulting in 8,533,061 working days lost and £4,785,607 in lost wages.
Repatriation and demobilisation
Rather than employing a system that returned men by units, or by employment categories, it was decided to utilise an egalitarian system that saw men who had been away for the longest period of time being returned first. Due to the size of the forces deployed overseas—roughly 167, 000 personnel in France, Britain and Egypt—and the logistical requirements of bringing them home the process was nevertheless a lengthy one and as such it became important to occupy the troops while they waited. In order to achieve this and to prepare the men for a return to civilian employment, a vocational education scheme was set up by George Long and troops in Britain were offered educational courses and civilian work placement opportunities and although these programmes were not as successful as hoped, several thousand soldiers took advantage of them.
Some Australians decided to delay their departure and instead joined the British Army and went on to serve in Northern Russia during the Russian Civil War
Russian Civil War
The Russian Civil War was a multi-party war that occurred within the former Russian Empire after the Russian provisional government collapsed to the Soviets, under the domination of the Bolshevik party. Soviet forces first assumed power in Petrograd The Russian Civil War (1917–1923) was a...
, although officially the Australian government refused to contribute forces to the campaign
Australian contribution to the Allied Intervention in Russia 1918–1919
The Russian Civil War began after the provisional government collapsed and the Bolshevik party assumed power in Russia in October 1917. The principal fighting occurred between the Bolshevik Red Army and the forces of the White Army, being a group of loosely-allied anti-Bolshevik forces...
.
, , and served in the Black Sea
Black Sea
The Black Sea is bounded by Europe, Anatolia and the Caucasus and is ultimately connected to the Atlantic Ocean via the Mediterranean and the Aegean seas and various straits. The Bosphorus strait connects it to the Sea of Marmara, and the strait of the Dardanelles connects that sea to the Aegean...
during the same conflict. Elsewhere, in Egypt in early 1919, a number of Australian light horse units were used to quell a nationalist uprising
Egyptian Revolution of 1919
The Egyptian Revolution of 1919 was a countrywide revolution against the British occupation of Egypt and Sudan. It was carried out by Egyptians and Sudanese from different walks of life in the wake of the British-ordered exile of revolutionary leader Saad Zaghlul, and other members of the Wafd...
while they were waiting for passage back to Australia. Despite shortages in shipping, the process of returning the soldiers to Australia was completed faster than expected and by September 1919 there were 10,000 men still left in Britain waiting for repatriation. The last of the main transports conveying Australian troops left England on 23 December 1919, arriving in Australia in early 1920. A year later, on 1 April 1921, the AIF was officially disbanded.
The process of repatriation did not end there, though. Upon their return to Australia the effort shifted towards placing the returned soldiers into employment, or education and taking care of those that were too badly injured to work. In order to meet these needs the Commonwealth established the Repatriation Department, tasked with managing the placement of returned soldiers into employment, training, education, housing. Eventually this also included the colossal task of managing the provision of war pensions, managing repatriation hospitals and convalescent homes and administering the Soldier Settlement Scheme
Soldier settlement (Australia)
Soldier settlement refers to the occupation and settlement of land throughout parts of Australia by returning discharged soldiers under schemes administered by the State Governments after World Wars I and II.- World War I :...
. The total cost of these provisions was considerable, and in June 1935 it was estimated to have cost approximately £238,000,000 which was more than the total amount spent on defence during the war.
In order to advocate for the many thousands of returned servicemen and women many ex-services organisations sprang up. The most prominent of these was probably the Returned Sailors and Soldiers Imperial League of Australia
Returned and Services League of Australia
The Returned and Services League of Australia is a support organisation for men and women who have served or are serving in the Australian Defence Force ....
which had been established in 1916 by representatives from many state based organisations already in existence. Following the war this organisation grew in its political influence as its numbers grew and was very active in the repatriation process, advocating for financial entitlements for veterans and securing concessions for soldiers returning to civilian employment. By 1919 it was estimated to have 150,000 members although this fell dramatically in the mid-1920s.
Legacy
The war affected Australia in many ways, although arguably not as greatly as it did the many European nations that were more directly involved. Economically the war had a number of significant impacts, although the Great Depression would later prove far more significant and Australian industry was not as greatly transformed as it would be following World War II. The political landscape was also transformed due to the rifts that resulted from the issue of conscription, while to a smaller extent the role of women in society also evolved as more women entered the workforce. Indeed between 1914 and 1918 there had been a 13 per cent increase in the employment of women, however, this was mainly in areas were women were traditionally employed. Equally although around 2,000 women were employed as nurses in the AIF, there was no great involvement of women in the military during the war.Another legacy was the manner in which it led to the emergence—albeit only fleetingly—of an independence in Australian foreign affairs. Although previously Australian foreign interests had been largely handled by Britain, as a combatant Australia sent its own delegation to the Paris Peace Conference in 1919, while it also began to take a more assertive role in regional affairs in the Pacific. At the peace conference Prime Minister Hughes pushed aggressively for reparations and an Australian mandate over German New Guinea; a stance which conflicted with the liberal internationalist inspired Fourteen Points
Fourteen Points
The Fourteen Points was a speech given by United States President Woodrow Wilson to a joint session of Congress on January 8, 1918. The address was intended to assure the country that the Great War was being fought for a moral cause and for postwar peace in Europe...
put forward by American President Woodrow Wilson
Woodrow Wilson
Thomas Woodrow Wilson was the 28th President of the United States, from 1913 to 1921. A leader of the Progressive Movement, he served as President of Princeton University from 1902 to 1910, and then as the Governor of New Jersey from 1911 to 1913...
. Regardless, following the war there was little real change in Imperial relations and Dominion affairs and as a result the war arguably did not lead to any significant change in Australia's perception of its role in the world. Indeed profound change would only occur following the Japanese crisis of 1942, which ultimately saw Australia pursue a foreign policy more independent of Britain, and an alliance with the United States
ANZUS
The Australia, New Zealand, United States Security Treaty is the military alliance which binds Australia and New Zealand and, separately, Australia and the United States to cooperate on defence matters in the Pacific Ocean area, though today the treaty is understood to relate to attacks...
.
Perhaps the greatest effect of the war was a psychological one. The heavy losses deeply affected many directly, and war memorials were built all over the country as people sought to remember those that had been killed. However, despite the size of Australia's contribution to the fighting there were many Australians who had had no actual experience of it. Realising this and having witnessed the impact of the war first hand, Charles Bean
Charles Bean
Charles Edwin Woodrow Bean , usually identified as C.E.W. Bean, was an Australian schoolmaster, judge's associate, barrister journalist, war correspondent and historian....
, who was instrumental in editing and writing the official history of Australia's involvement in the war, advocated the need for a national memorial and was one of the main architects in establishing the Australian War Memorial
Australian War Memorial
The Australian War Memorial is Australia's national memorial to the members of all its armed forces and supporting organisations who have died or participated in the wars of the Commonwealth of Australia...
in Canberra
Canberra
Canberra is the capital city of Australia. With a population of over 345,000, it is Australia's largest inland city and the eighth-largest city overall. The city is located at the northern end of the Australian Capital Territory , south-west of Sydney, and north-east of Melbourne...
. The experience of the war also perpetuated many notions about the Australian character and national identity that endure to this day. For many Australians the performance of their soldiers—particularly during the failed Gallipoli campaign—served to highlight the nation's emergence as a member of the international community, while bringing to the fore a belief in Australian’s natural ability as soldiers. The attitudes of many Australians towards war itself were also greatly affected. There was a widespread revulsion at the large scale destruction and loss of life that had occurred and a desire that it should never occur again. In many regards this led to a general complacency towards defence and military matters after the war and arguably led to the nation's lack of preparedness for the next war, while it may still be evident in Australian strategic behaviour to this day.Arguably such notions remain common in Australian society today, although their impact upon the formulation of defence policy may have been limited by the development of a standing, professional force after World War II. For a discussion of the impact of the conflict between traditional Australian notions of social nationalism and military professionalism, as well as the way in which the ideals of ANZAC have led to Australian strategic complacency see Evans 2005.
Statistics
During World War I over 421,809 Australians served in the military with 331,781 serving overseas. Over 60,000 Australians lost their lives and 137,000 were wounded.These casualties can be broken down as follows: 53,993 battle-related deaths; 7,727 non-battle related deaths; 137,013 wounded in action; 16,496 gassed; 3,647 prisoners of war and 109 prisoner of war deaths. See Australian War Memorial As a percentage of forces committed, this equalled a casualty rate of almost 65 percent, one of the highest casualty rates amongst the British EmpireBritish Empire
The British Empire comprised the dominions, colonies, protectorates, mandates and other territories ruled or administered by the United Kingdom. It originated with the overseas colonies and trading posts established by England in the late 16th and early 17th centuries. At its height, it was the...
forces. The financial cost of the war to the Australian government was £
Pound sterling
The pound sterling , commonly called the pound, is the official currency of the United Kingdom, its Crown Dependencies and the British Overseas Territories of South Georgia and the South Sandwich Islands, British Antarctic Territory and Tristan da Cunha. It is subdivided into 100 pence...
188,480,000. The following table lists the number of Australian casualties by cause during the war.