
.gif)
Battle of Albert (1916)
Encyclopedia
The Battle of Albert, 1 July – 13 July 1916, was the opening phase of the British
and French offensive that became the Battle of the Somme.
, as the commander of the British Fourth Army, which had the major responsibility in the battle, originally proposed an initial offensive limited to gaining a foothold in part of the German first line and holding it against expected German counterattacks. One reason was to avoid having the infantry advance beyond the range of their supporting artillery, which would find it difficult to advance across the battlefield because the Somme was farming country with few roads. Another was that the first German line was situated on "forward" slopes i.e. on or below the crests of the ridge of low hills facing the British along the line Gommecourt
- Serre
- Beaumont Hamel - Thiepval
- Ovillers - la Boisselle - Fricourt
. This meant that the German first line was above but at least visible to British artillery - trench lines cut in the white chalk showed as white stripes across the hills. Only on the sector further south from Fricourt
- Mametz
- Montauban
did the British observers actually overlook the German first line positions.
However, the second German position was situated some 2 miles behind the first position, on "reverse slopes" visible only to aircraft, on the other side of the ridges running Beaucort - Mouquet Farm - Contalmaison - Bazentin-le-Grand - Longeval, which Rawlinson believed presented a different problem. The barbed wire in front of the German second position was effectively outside the range of the British 18-pounder guns
and trench mortars
assigned for wire-cutting, as they stood at the start of this battle. In fact reverse-slopes could only be attacked by howitzers and mortars due to their ability to fire over the crest of hills, but the British did not yet possess an instantaneous fuze which was needed to enable field howitzers to cut barbed wire using high-explosive shells. Without an instantaneous fuze, high-explosive shells penetrated the ground slightly before exploding and hence wasted most of their energy in digging holes. Fuze No. 106
became available after the Somme battles and gave the British the capability to burst high-explosive shells at ground level and hence eliminate barbed wire in any position. On the Somme the British had to rely on flat-trajectory guns firing shrapnel, and "toffee-apple" mortars
, with a range of only 570 yards, to blow aside barbed wire.
Rawlinson first wanted to capture and consolidate along the German first line from Serre to Maricourt, advance his artillery then plan and stage a separate assault on the German second line, in accordance with his cautious doctrine of "bite and hold". Haig rejected this :
Haig demanded and got a plan for a breakthrough battle that aimed at capturing the German second line in the initial assault, even as far as Bapaume, 7 miles from the start line. One implication of this was that the initial week-long British artillery bombardment was over-extended and diluted by being spread in depth over both first and second German defensive positions, the first consisting of up to three trench lines and the second position of up to two trench lines, instead of being concentrated on just the first German position. This extended the zone bombarded from 1,250 yards to an average of 2,500 yards.
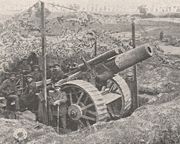 The British concentrated and deployed artillery on a scale unprecedented up until then. On 24th June they commenced a weeklong bombardment of the German trenches, known artillery batteries and lines of communication, intended to destroy German defences prior to the infantry attack :
Field artillery:
Heavy artillery:
Mortars:
The French supplied the following artillery to assist the British bombardment:
This total of 1,537 guns provided one field gun per 20 yards of front, and one heavy gun per fifty-eight yards. It was employed against a total of 22,000 yards of front, but to this must be added 300,000 yards of support trenches. If one considers that 1 million out of 1.5 million of the shells fired in the preliminary bombardment were shrapnel which could blow aside barbed wire but not harm enemy soldiers under cover, and that many of the remaining high-explosive shells failed to explode due to poor quality of mass-produced fuses, it is evident in hindsight compared to later battles that the bombardment had little chance of destroying a significant percentage of defenders.
In any event, the 1.7 million shells fired in the 7-day preparatory barrage and first day of the battle and the 17 mines fired just prior to the assault failed to destroy the German defenders on most parts of the front. Most German defenders survived the barrage in shell-proof observation posts and bunkers and were able to man frontline defences when the assault began. This would later lead to a reevaluation of the British artillery doctrine with a change of emphasis from destructive to neutralising fire i.e. a realization that a determined enemy and his arms could not be simply destroyed by artillery but his ability to fight back at the crucial moment could be severely limited if correctly targeted.
) :
German guns appear to have survived the initial long bombardment by not firing and hence not revealing their positions :
The result of few German guns being destroyed in the preliminary British barrage, together with "at least 17 field howitzer batteries and 36 smaller guns" brought up in reinforcement, was that on 1 July the Germans had 598 field guns and 246 heavier guns available to saturate No Man's Land and the British front line when the British attacked. Hence the Germans had 844 guns with a much simpler task than that of the British guns - they had merely to concentrate on the relatively narrow area between the opposing lines in general, against men unprotected above ground, rather than the British guns' task of attempting to strike belts of barbed wire and specific targets, both camouflaged and under heavy cover, many imprecisely located, between the German front line and up to 2,500 yards beyond.
The telephone lines between the German front lines and their artillery support was in fact cut in many places, but the front line troops were still able to use signal flares to request effective artillery support. The main effect of German artillery fire on 1 July was to saturate no-man's-land and the British front line with fire and hence prevented the British from sending forward reinforcements to consolidate the small gains that surviving attacking troops made. The result was that small groups that managed to capture German positions, such as the 36th (Ulster) Division at the Schwaben Redoubt
, could not be reinforced, and hence were soon killed or captured by German reinforcements.
In stark contrast, the French attack was successful and incurred relatively few casualties by the standards of the day. The XX Corps advanced beyond Curlu north of the Somme and was only halted because it depended on the British to protect its left flank, and the British did not advance beyond Montauban. South of the Somme the French I Colonial Corps and XXXV Corps approached the German second position and took 4,000 prisoners.
For these reasons the events of the "First Day on the Somme" as they affected the British tend to obscure the overall picture of what was a joint British-French offensive operation, by downplaying both the French and German performance.
However, General Farndale asserts that "It was clear by last light on 1 July, where it had been used, the creeping barrage was a success" and hence there was enough tactical information available to provide the British with some optimism for future operations.
For the remainder of this period the British carried out numerous small assaults while they digested the results of the first major attack. On 9 July the artillery order for the next phase of the battle was signed, and this still left responsibility for details to individual Corps BGRAs, and perpetuated the loose rather than tight coordination of artillery and infantry which had contributed to the failures of 1 July.
The French attack astride and south of the Somme was far more successful than that of the British north of the Somme. However, the British failure to advance meant the French XX Corps north of the Somme could not continue its advance as it needed to protect its left flank. Opposite the French sector the geography was less favorable to defenders, German trenches and dugouts were not as strong as those further north, and there had been greater turnover of defending German units. The French 6th Army advanced as far as 10 km at points along a 20 km front and occupied the entire Flaucourt plateau (which constituted the principal defence of Péronne) while taking 12,000 prisoners, 85 cannons, 26 minenwerfers, 100 machine guns, and other assorted materials, all with relatively minimal losses.
On 11 July the British bombarded and attacked Trones Wood (between Montauban and Guillemont), which was considered necessary to be held before the next stage of the battle, the attack on the German second position towards Guillemont and Longeval, could be launched. The British occupied Trones and part of the wood by the 12th but could not capture the entire wood until the 14th.
in April 1917, would concentrate 963 heavy guns at one every 21 yards, more than twice the concentration applied on the Somme, and supplied with much larger quantities of ammunition of higher quality, including the new No. 106 instantaneous percussion fuze
. Hence it was only after the Somme experience that the British realised, and became able to bring to bear, the enormous volumes of artillery fire required to achieve any breakthrough in the prevailing siege-like stalemate. In conjunction with lessons learned on infantry-artillery coordination and counter-battery fire, and industrial quality-control, this led to far greater British opening-day success at Arras than on the Somme.
, believed that the British had underperformed, and insisted that they attack and break through at Thiepval spur and Pozières Ridge, which was precisely where they had failed so far, in order to open up the path to the German second position. Rawlinson also favoured this approach, believing he needed to maintain pressure on the German reserves that had been drawn in and wear them out :
Haig disagreed, and instead stated his preference to exploit the tactical breakthrough so far achieved in the south, at a meeting with Joffre on 3 July. Haig wanted the French to attack Guillemont while the British attacked Longueval from their break-in enclave at Mametz - Montauban. This angered Joffre, who may have believed that the British, by taking the pressure off the Germans in their own sector of the Somme, were leading the French to take a major share in the battle instead of relieving the German pressure on them at Verdun. Haig refused to allow Joffre to dictate tactics to him, and according to Christopher Duffy : "... from that time onwards the British and French efforts on the Somme scarcely counted as a joint offensive".
dismissed Second Army's chief of staff Major General Grünert, who he blamed for the French successes during this battle, and replaced him with his own operations officer, the defensive specialist Colonel Fritz von Lossberg
on 2 July. Von Lossberg began changing German defensive doctrine from one of holding the front line in force, as previously ordered by Second Army's commander Fritz von Below
and von Falkenhayn, to a new doctrine of flexible defense in depth to minimise casualties, with reserves held further back in relative safety available to recover lost ground by counter-attacks.
On 12 July von Falkenhayn called off his attack on the French at Verdun
. This may be viewed as a strategic consequence of pressure exerted on German defenders during the Battle of Albert and the need to send reinforcements. However, the German attack on Fort Souville on 11 July had already failed and the Battle of Verdun
had by then degenerated into a costly stalemate and the Russian Brusilov Offensive
on the Eastern front was placing new demands on German forces.
While the Battle of Albert can be viewed as a German tactical victory over the British, and at worst a stalemate, at the strategic level the situation was viewed as worrying. The growing British artillery strength, backed by the increasingly large supplies of guns and ammunition from the United States, demonstrated that in future the British would hold artillery superiority, especially as Britain could be expected to improve its usage of this advantage. This battle also demonstrated the first coordinated offensives by the Allies
, compared with the piecemeal offensives to date :
A German intelligence report of 4 July concluded :
Germany was forced to abandon an intended attack by Sixth Army further north, instead diverting its divisions to the Somme front - 14 by 9 July. Haig's apparent willingness to commit the British army to a war of attrition alarmed German leaders as it was recognised that Germany lacked the manpower and reserves itself to fight a war of attrition.
General von Below was effectively demoted to command First Army north of the Somme river, with General Max von Gallwitz
in command both of the overall Somme front, and of Second Army which was now responsible for the zone south of the Somme river. In addition, the Germans divided their army corps on the Somme into Gruppen named after their commanders to achieve better control of the now enlarged troop numbers. Divisions could be transferred between Gruppen but each Grup had its set area of responsibility : Gruppe Stein (XIV Reserve Corps) in the north, Gruppe Sixt von Armin
(IV Corps) in the centre and Gruppe Gossler (VI Reserve Corps) in the south. This arrangement was scheduled to be implemented early on 14 July, unfortunately for the Germans at precisely the same moment when the British launched the next phase of their offensive, the Battle of Bazentin Ridge
.
British Empire
The British Empire comprised the dominions, colonies, protectorates, mandates and other territories ruled or administered by the United Kingdom. It originated with the overseas colonies and trading posts established by England in the late 16th and early 17th centuries. At its height, it was the...
and French offensive that became the Battle of the Somme.
Haig's desire to break through versus Rawlinson's "bite and hold"
General RawlinsonHenry Rawlinson, 1st Baron Rawlinson
General Henry Seymour Rawlinson, 1st Baron Rawlinson, GCB, GCSI, GCVO, KCMG , known as Sir Henry Rawlinson, Bt between 1895 and 1919, was a British First World War general most famous for his roles in the Battle of the Somme of 1916 and the Battle of Amiens in 1918.-Military career:Rawlinson was...
, as the commander of the British Fourth Army, which had the major responsibility in the battle, originally proposed an initial offensive limited to gaining a foothold in part of the German first line and holding it against expected German counterattacks. One reason was to avoid having the infantry advance beyond the range of their supporting artillery, which would find it difficult to advance across the battlefield because the Somme was farming country with few roads. Another was that the first German line was situated on "forward" slopes i.e. on or below the crests of the ridge of low hills facing the British along the line Gommecourt
Gommecourt
Gommecourt is the name of two communes in France:* Gommecourt, Pas-de-Calais* Gommecourt, Yvelines...
- Serre
Serre
Serre may refer to:* Claude Serre , a French cartoonist* Jean-Pierre Serre , a French mathematician active in algebraic geometry, number theory and topology* Serre Chevalier, a major French ski resort in the southern part of the Alps...
- Beaumont Hamel - Thiepval
Thiepval
The Thiepval Memorial to the Missing of the Somme is a major war memorial to 72,191 missing British and South African men who died in the Battles of the Somme of the First World War between 1915 and 1918 who have no known grave...
- Ovillers - la Boisselle - Fricourt
Fricourt
Fricourt is a commune in the Somme department in Picardie in northern France.-Geography:Fricourt is situated on the D147 and D64 junction, some northeast of Amiens.-History:...
. This meant that the German first line was above but at least visible to British artillery - trench lines cut in the white chalk showed as white stripes across the hills. Only on the sector further south from Fricourt
Fricourt
Fricourt is a commune in the Somme department in Picardie in northern France.-Geography:Fricourt is situated on the D147 and D64 junction, some northeast of Amiens.-History:...
- Mametz
Mametz
Mametz is the name of two communes in France:* Mametz, Pas-de-Calais* Mametz, Somme...
- Montauban
Montauban
Montauban is a commune in the Tarn-et-Garonne department in the Midi-Pyrénées region in southern France. It is the capital of the department and lies north of Toulouse....
did the British observers actually overlook the German first line positions.
However, the second German position was situated some 2 miles behind the first position, on "reverse slopes" visible only to aircraft, on the other side of the ridges running Beaucort - Mouquet Farm - Contalmaison - Bazentin-le-Grand - Longeval, which Rawlinson believed presented a different problem. The barbed wire in front of the German second position was effectively outside the range of the British 18-pounder guns
Ordnance QF 18 pounder
The Ordnance QF 18 pounder, or simply 18-pounder Gun, was the standard British Army field gun of the World War I era. It formed the backbone of the Royal Field Artillery during the war, and was produced in large numbers. It was also used by British and Commonwealth Forces in all the main theatres,...
and trench mortars
2 inch Medium Mortar
The 2 inch Medium Trench Mortar, also known as the 2-inch Howitzer, and nicknamed the "Toffee Apple" or "Plum Pudding" mortar, was a British SBML medium trench mortar in use in World War I from mid 1915 to mid 1917...
assigned for wire-cutting, as they stood at the start of this battle. In fact reverse-slopes could only be attacked by howitzers and mortars due to their ability to fire over the crest of hills, but the British did not yet possess an instantaneous fuze which was needed to enable field howitzers to cut barbed wire using high-explosive shells. Without an instantaneous fuze, high-explosive shells penetrated the ground slightly before exploding and hence wasted most of their energy in digging holes. Fuze No. 106
No. 106 Fuze
Number 106 Fuze was the first British instantaneous percussion artillery fuze, first tested in action in late 1916 and deployed in volume in early 1917.-Background:...
became available after the Somme battles and gave the British the capability to burst high-explosive shells at ground level and hence eliminate barbed wire in any position. On the Somme the British had to rely on flat-trajectory guns firing shrapnel, and "toffee-apple" mortars
2 inch Medium Mortar
The 2 inch Medium Trench Mortar, also known as the 2-inch Howitzer, and nicknamed the "Toffee Apple" or "Plum Pudding" mortar, was a British SBML medium trench mortar in use in World War I from mid 1915 to mid 1917...
, with a range of only 570 yards, to blow aside barbed wire.
Rawlinson first wanted to capture and consolidate along the German first line from Serre to Maricourt, advance his artillery then plan and stage a separate assault on the German second line, in accordance with his cautious doctrine of "bite and hold". Haig rejected this :
"His [Rawlinson's] intention is merely to take the enemy's first and second system of trenches and 'kill Germans'. He looks upon the gaining of three or four kilometres more or less of ground immaterial. I think we can do better than this by aiming at getting as large a combined force of French and British across the Somme and fighting the enemy in the open !".
Haig demanded and got a plan for a breakthrough battle that aimed at capturing the German second line in the initial assault, even as far as Bapaume, 7 miles from the start line. One implication of this was that the initial week-long British artillery bombardment was over-extended and diluted by being spread in depth over both first and second German defensive positions, the first consisting of up to three trench lines and the second position of up to two trench lines, instead of being concentrated on just the first German position. This extended the zone bombarded from 1,250 yards to an average of 2,500 yards.
Limited effectiveness of the British preparatory bombardment
Field artillery:
- 808 18-pounder gunsOrdnance QF 18 pounderThe Ordnance QF 18 pounder, or simply 18-pounder Gun, was the standard British Army field gun of the World War I era. It formed the backbone of the Royal Field Artillery during the war, and was produced in large numbers. It was also used by British and Commonwealth Forces in all the main theatres,...
(3.3-inch): for cutting barbed wire with shrapnel and attacking enemy troops repairing damage - 202 4.5-inch howitzersQF 4.5 inch HowitzerThe Ordnance QF 4.5 inch Howitzer was the standard British Empire field howitzer of the First World War era. It replaced the BL 5 inch Howitzer and equipped some 25% of the field artillery. It entered service in 1910 and remained in service through the interwar period and was last used in...
Heavy artillery:
- 32 4.7-inch gunsQF 4.7 inch Gun Mk I - IVThe QF 4.7 inch Gun Mks I, II, III, and IV were a family of United-Kingdom 120-mm naval and coast defence guns of 1888 and 1890s which served with the navies of various countries. They were also mounted on various wheeled carriages to provide the British Army with a long range gun...
: for counter-battery fire - 128 60-pounder guns (5-inch): for counter-battery fire
- 20 6-inch gunsBL 6 inch Mk VII naval gunThe BL 6 inch Gun Mark VII was a British naval gun dating from 1899, which was mounted on a heavy traveling carriage in 1915 for British Army service to become one of the main heavy field guns in the First World War, and also served as one of the main coast defence guns throughout the British...
: cutting barbed wire, and counter-battery fire - 1 9.2-inch railway gunBL 9.2 inch Railway GunThe Ordnance BL 9.2 inch gun on truck, railway mounted a variety of surplus 9.2 inch naval guns, together with the custom-designed Mk XIII railway gun, on various railway platforms to provide mobile long-range heavy artillery on the Western Front in World War I.-Second Boer War...
- 1 12-inch railway gunBL 12 inch Railway GunThe Ordnance BL 12 inch gun Mk IX on truck, railway mounted surplus 12 inch Mk IX W naval guns, manufactured by Woolwich Arsenal in 1906, on various railway platforms to provide mobile long-range heavy artillery on the Western Front in World War I....
- 104 6-inch howitzers
- 64 8-inch howitzersBL 8 inch Howitzer Mk 1 - 5The BL 8-Inch Howitzer Mark I through to Mark V were a British improvisation developed early in the First World War to provide heavy artillery...
- 60 9.2-inch howitzersBL 9.2 inch HowitzerThe Ordnance BL 9.2 inch howitzer was the principal counter-battery equipment of British forces in France in World War I. It equipped a substantial number of siege batteries of the Royal Garrison Artillery...
- 11 12-inch railway howitzersBL 12 inch Railway HowitzerThe Ordnance BL 12 inch howitzer on truck, railway was developed following the success of the 9.2 inch siege howitzer. It was similar but unrelated to the 12 inch siege howitzers Mk II and IV.-Mark I:Mk I was introduced from March 1916...
- 6 15-inch howitzersBL 15 inch HowitzerThe Ordnance BL 15 inch howitzer was developed by the Coventry Ordnance Works late in 1914 in response to the success of its design of the 9.2 inch siege howitzer.-History and use:...
Mortars:
- 2-inch medium mortars2 inch Medium MortarThe 2 inch Medium Trench Mortar, also known as the 2-inch Howitzer, and nicknamed the "Toffee Apple" or "Plum Pudding" mortar, was a British SBML medium trench mortar in use in World War I from mid 1915 to mid 1917...
: for cutting barbed wire
The French supplied the following artillery to assist the British bombardment:
- 60 75-mm guns (gas only)
- 24 120-mm guns
- 16 220-mm howitzers
This total of 1,537 guns provided one field gun per 20 yards of front, and one heavy gun per fifty-eight yards. It was employed against a total of 22,000 yards of front, but to this must be added 300,000 yards of support trenches. If one considers that 1 million out of 1.5 million of the shells fired in the preliminary bombardment were shrapnel which could blow aside barbed wire but not harm enemy soldiers under cover, and that many of the remaining high-explosive shells failed to explode due to poor quality of mass-produced fuses, it is evident in hindsight compared to later battles that the bombardment had little chance of destroying a significant percentage of defenders.
In any event, the 1.7 million shells fired in the 7-day preparatory barrage and first day of the battle and the 17 mines fired just prior to the assault failed to destroy the German defenders on most parts of the front. Most German defenders survived the barrage in shell-proof observation posts and bunkers and were able to man frontline defences when the assault began. This would later lead to a reevaluation of the British artillery doctrine with a change of emphasis from destructive to neutralising fire i.e. a realization that a determined enemy and his arms could not be simply destroyed by artillery but his ability to fight back at the crucial moment could be severely limited if correctly targeted.
British counter-battery fire
In this battle there tended to always be enough highly-trained and motivated German survivors after barrages to man their defensive weapons such as machine-guns, field guns and howitzers. In addition the Germans had paid extraordinary attention to battlefield communication means and procedures, such as very deeply laid telephone lines, carefully coordinated infantry-artillery liaison procedures, and signaling procedures to ensure that frontline troops were usually able to call for and get supporting defensive artillery fire when called upon. Again, the British counter-battery fire in many cases failed to suppress German gun batteries and hence they were available to answer calls for assistance once the main attack had begun. There were communication problems between the British Army and the RFC (Royal Flying CorpsRoyal Flying Corps
The Royal Flying Corps was the over-land air arm of the British military during most of the First World War. During the early part of the war, the RFC's responsibilities were centred on support of the British Army, via artillery co-operation and photographic reconnaissance...
) :
"... when army pilots had been closely linked to guns, all was well. The removal of these pilots to the more rarefied atmosphere of the RFC did not help this co-operation. However, on Zero-Day 1 July, the enemy guns had not been silenced and were able to bring down heavy defensive fire on the attacking infantry [of III Corps]... Though an attempt had been made to co-ordinate the counter-battery fire, its effects had varied from being extremely successful [VIII and XV Corps front] to almost non-effective III Corps... they were let down by shortages of and inadequate equipment and communications".
German guns appear to have survived the initial long bombardment by not firing and hence not revealing their positions :
"...there was an unbroken stream of calls for assistance from the front line to engage these terrible means of destruction [mortars] with counter fire. The artillery declared that it was unable to respond to the wishes of the infantry if it was to preserve its guns and so remain ready to fire defensively once the general attack came..." : Landwehr Leutnant M. Gerster, Reserve Infantry Regiment 119, speaking of events about 29 June near Beaumont Hamel.
The result of few German guns being destroyed in the preliminary British barrage, together with "at least 17 field howitzer batteries and 36 smaller guns" brought up in reinforcement, was that on 1 July the Germans had 598 field guns and 246 heavier guns available to saturate No Man's Land and the British front line when the British attacked. Hence the Germans had 844 guns with a much simpler task than that of the British guns - they had merely to concentrate on the relatively narrow area between the opposing lines in general, against men unprotected above ground, rather than the British guns' task of attempting to strike belts of barbed wire and specific targets, both camouflaged and under heavy cover, many imprecisely located, between the German front line and up to 2,500 yards beyond.
The telephone lines between the German front lines and their artillery support was in fact cut in many places, but the front line troops were still able to use signal flares to request effective artillery support. The main effect of German artillery fire on 1 July was to saturate no-man's-land and the British front line with fire and hence prevented the British from sending forward reinforcements to consolidate the small gains that surviving attacking troops made. The result was that small groups that managed to capture German positions, such as the 36th (Ulster) Division at the Schwaben Redoubt
Schwaben Redoubt
The Schwaben Redoubt lies between the Thiepval Memorial and the Ulster tower. It was a German strongpoint on the western front in the First World War. Consisting of a mass of gun emplacements, trenches and tunnels, this warren of defensive works helped anchor the German line on the Somme until late...
, could not be reinforced, and hence were soon killed or captured by German reinforcements.
Faulty implementation of creeping barrages
The divisional artillery of most British attacking infantry Corps failed to correctly follow the new tactics for coordinating infantry assaults and creeping barrages (creeping barrages were intended to lay down fire in front of attacking troops to force the enemy to remain under cover). VIII Corps (opposite Serre in the north end of the attack) guns lifted the barrage 100 yards every 2 minutes instead of 50-yard increments per minute as had been intended and hence because No Man's Land was so narrow the barrage began on rather than in front of the German trenches and then lifted beyond leaving the advancing troops to face unsuppressed defenders; XIII Corps (opposite Montauban in the south end of the attack) with the exception of 18th Division abandoned the creeping barrage altogether, and 18th Division alone attacked with any success; III Corps (opposite La Boisselle in the centre) artillery employed old discredited tactics of "raking" back and forth rather than providing a consistently forward-movement of fire behind which the infantry could advance and the attack failed. X Corps (opposite Thiepval) gunfire jumped from trench to trench and some "walked" up communications trenches, again instead of consistently moving forward at a pace the infantry could follow. 9th Brigade adjusted its tactics by advancing close behind the barrage and was able to take the first German trench but was forced to withdraw when the barrage then jumped away to the second line of trenches leaving it uncovered. XV Corps (opposite Fricourt) had mixed success : 21st Division artillery "searched" backwards and forwards making it very difficult for infantry to advance behind it and was unsuccessful; artillery of 50th Brigade of 17th Division lifted 500 yards and hence its infantry advanced with no protection and failed; 7th Division's artillery lifted 50 yards as planned and its infantry were successful.1 July 1916
The result of faulty British planning and tactics and German preparedness was that the first day of the attack constituted a major German victory on most of the front which the British attacked. The British army suffered its highest-ever casualty rate in a single day, in return for a modest advance on the extreme right where it captured and held Mametz and Montauban.In stark contrast, the French attack was successful and incurred relatively few casualties by the standards of the day. The XX Corps advanced beyond Curlu north of the Somme and was only halted because it depended on the British to protect its left flank, and the British did not advance beyond Montauban. South of the Somme the French I Colonial Corps and XXXV Corps approached the German second position and took 4,000 prisoners.
For these reasons the events of the "First Day on the Somme" as they affected the British tend to obscure the overall picture of what was a joint British-French offensive operation, by downplaying both the French and German performance.
2 to 13 July
The "fog of war" meant that it took time for much information on the extent of failure, the few successes and lessons to be learned to get back to the British high command and for changes to be implemented. They were hence slow to attempt to exploit the only success of 1 July, the capture of Mametz and Montauban south of the Albert-Bapaume road.However, General Farndale asserts that "It was clear by last light on 1 July, where it had been used, the creeping barrage was a success" and hence there was enough tactical information available to provide the British with some optimism for future operations.
For the remainder of this period the British carried out numerous small assaults while they digested the results of the first major attack. On 9 July the artillery order for the next phase of the battle was signed, and this still left responsibility for details to individual Corps BGRAs, and perpetuated the loose rather than tight coordination of artillery and infantry which had contributed to the failures of 1 July.
The French attack astride and south of the Somme was far more successful than that of the British north of the Somme. However, the British failure to advance meant the French XX Corps north of the Somme could not continue its advance as it needed to protect its left flank. Opposite the French sector the geography was less favorable to defenders, German trenches and dugouts were not as strong as those further north, and there had been greater turnover of defending German units. The French 6th Army advanced as far as 10 km at points along a 20 km front and occupied the entire Flaucourt plateau (which constituted the principal defence of Péronne) while taking 12,000 prisoners, 85 cannons, 26 minenwerfers, 100 machine guns, and other assorted materials, all with relatively minimal losses.
On 11 July the British bombarded and attacked Trones Wood (between Montauban and Guillemont), which was considered necessary to be held before the next stage of the battle, the attack on the German second position towards Guillemont and Longeval, could be launched. The British occupied Trones and part of the wood by the 12th but could not capture the entire wood until the 14th.
Lessons learned by the British
The next major British set-piece opening barrage, before the Battle of ArrasBattle of Arras (1917)
The Battle of Arras was a British offensive during the First World War. From 9 April to 16 May 1917, British, Canadian, New Zealand, Newfoundland, and Australian troops attacked German trenches near the French city of Arras on the Western Front....
in April 1917, would concentrate 963 heavy guns at one every 21 yards, more than twice the concentration applied on the Somme, and supplied with much larger quantities of ammunition of higher quality, including the new No. 106 instantaneous percussion fuze
No. 106 Fuze
Number 106 Fuze was the first British instantaneous percussion artillery fuze, first tested in action in late 1916 and deployed in volume in early 1917.-Background:...
. Hence it was only after the Somme experience that the British realised, and became able to bring to bear, the enormous volumes of artillery fire required to achieve any breakthrough in the prevailing siege-like stalemate. In conjunction with lessons learned on infantry-artillery coordination and counter-battery fire, and industrial quality-control, this led to far greater British opening-day success at Arras than on the Somme.
British and French disagreement on what to do next
The French Commander-in-Chief, General JoffreJoseph Joffre
Joseph Jacques Césaire Joffre OM was a French general during World War I. He is most known for regrouping the retreating allied armies to defeat the Germans at the strategically decisive First Battle of the Marne in 1914. His popularity led to his nickname Papa Joffre.-Biography:Joffre was born in...
, believed that the British had underperformed, and insisted that they attack and break through at Thiepval spur and Pozières Ridge, which was precisely where they had failed so far, in order to open up the path to the German second position. Rawlinson also favoured this approach, believing he needed to maintain pressure on the German reserves that had been drawn in and wear them out :
"... It is also necessary to secure, as early as possible, all important tactical points still in the position of the Germans in their front line system and intermediate line, with a view to an ultimate attack on the German Second Line" : General Rawlinson
Haig disagreed, and instead stated his preference to exploit the tactical breakthrough so far achieved in the south, at a meeting with Joffre on 3 July. Haig wanted the French to attack Guillemont while the British attacked Longueval from their break-in enclave at Mametz - Montauban. This angered Joffre, who may have believed that the British, by taking the pressure off the Germans in their own sector of the Somme, were leading the French to take a major share in the battle instead of relieving the German pressure on them at Verdun. Haig refused to allow Joffre to dictate tactics to him, and according to Christopher Duffy : "... from that time onwards the British and French efforts on the Somme scarcely counted as a joint offensive".
Consequences for the German army
A direct result of the Battle of Albert was that the German Chief of the General Staff Erich von FalkenhaynErich von Falkenhayn
Erich von Falkenhayn was a German soldier and Chief of the General Staff during World War I. He became a military writer after World War I.-Early life:...
dismissed Second Army's chief of staff Major General Grünert, who he blamed for the French successes during this battle, and replaced him with his own operations officer, the defensive specialist Colonel Fritz von Lossberg
Fritz von Lossberg
Friedrich Karl "Fritz" von Lossberg was a German colonel, and later general, of World War I. He was a strategic planner, especially of defence, who was Chief of Staff for the Second, Third and Fourth Armies. He was present at the battles of the Somme, Arras, and VerdunLossberg was born in Bad...
on 2 July. Von Lossberg began changing German defensive doctrine from one of holding the front line in force, as previously ordered by Second Army's commander Fritz von Below
Fritz von Below
Fritz Wilhelm Theodor Karl von Below was a Prussian general in the German Army during the First World War.-Biography:...
and von Falkenhayn, to a new doctrine of flexible defense in depth to minimise casualties, with reserves held further back in relative safety available to recover lost ground by counter-attacks.
On 12 July von Falkenhayn called off his attack on the French at Verdun
Battle of Verdun
The Battle of Verdun was one of the major battles during the First World War on the Western Front. It was fought between the German and French armies, from 21 February – 18 December 1916, on hilly terrain north of the city of Verdun-sur-Meuse in north-eastern France...
. This may be viewed as a strategic consequence of pressure exerted on German defenders during the Battle of Albert and the need to send reinforcements. However, the German attack on Fort Souville on 11 July had already failed and the Battle of Verdun
Battle of Verdun
The Battle of Verdun was one of the major battles during the First World War on the Western Front. It was fought between the German and French armies, from 21 February – 18 December 1916, on hilly terrain north of the city of Verdun-sur-Meuse in north-eastern France...
had by then degenerated into a costly stalemate and the Russian Brusilov Offensive
Brusilov Offensive
The Brusilov Offensive , also known as the June Advance, was the Russian Empire's greatest feat of arms during World War I, and among the most lethal battles in world history. Prof. Graydon A. Tunstall of the University of South Florida called the Brusilov Offensive of 1916 the worst crisis of...
on the Eastern front was placing new demands on German forces.
While the Battle of Albert can be viewed as a German tactical victory over the British, and at worst a stalemate, at the strategic level the situation was viewed as worrying. The growing British artillery strength, backed by the increasingly large supplies of guns and ammunition from the United States, demonstrated that in future the British would hold artillery superiority, especially as Britain could be expected to improve its usage of this advantage. This battle also demonstrated the first coordinated offensives by the Allies
Allies of World War I
The Entente Powers were the countries at war with the Central Powers during World War I. The members of the Triple Entente were the United Kingdom, France, and the Russian Empire; Italy entered the war on their side in 1915...
, compared with the piecemeal offensives to date :
"...for the first time since the commencement of the war, unity of action on the fronts of the Quadruple Alliance has become a fact, on which our enemies can congratulate themselves. We have got to face a Russian, an Italian and a Franco-English offensive at the same time..." Kölnische Volkszeitung, 4 July.
A German intelligence report of 4 July concluded :
"...we can be pretty sure that they will continue to pursue their aim by new attacks, perhaps backed up by even more artillery and ammunition... the British have invested too many hopes in the success of this attack for them to be deflected from their course by an initial failure".
Germany was forced to abandon an intended attack by Sixth Army further north, instead diverting its divisions to the Somme front - 14 by 9 July. Haig's apparent willingness to commit the British army to a war of attrition alarmed German leaders as it was recognised that Germany lacked the manpower and reserves itself to fight a war of attrition.
General von Below was effectively demoted to command First Army north of the Somme river, with General Max von Gallwitz
Max von Gallwitz
Max Karl Wilhelm von Gallwitz was a German general from Breslau , Silesia, who served with distinction during World War I on both the Eastern and Western Fronts.-Biography:...
in command both of the overall Somme front, and of Second Army which was now responsible for the zone south of the Somme river. In addition, the Germans divided their army corps on the Somme into Gruppen named after their commanders to achieve better control of the now enlarged troop numbers. Divisions could be transferred between Gruppen but each Grup had its set area of responsibility : Gruppe Stein (XIV Reserve Corps) in the north, Gruppe Sixt von Armin
Friedrich Bertram Sixt von Armin
Friedrich Bertram Sixt von Armin was a German general during the First World War.- Early life :...
(IV Corps) in the centre and Gruppe Gossler (VI Reserve Corps) in the south. This arrangement was scheduled to be implemented early on 14 July, unfortunately for the Germans at precisely the same moment when the British launched the next phase of their offensive, the Battle of Bazentin Ridge
Battle of Bazentin Ridge
The Battle of Bazentin Ridge, launched by the British Fourth Army at dawn on 14 July 1916, marked the start of the second phase of the Battle of the Somme. Dismissed beforehand by one French commander as "an attack organized for amateurs by amateurs", it turned out to be "hugely successful" for...
.